Welcome
The illustrations in the provided Wiki pages are for consultation purpose only and may not always reflect the latest implementation.
This page explains how to add, edit and delete activities for youth projects in My projects.
An activity is a set of tasks performed within the same location, the same time frame and the same scope. Each activity recorded in My projects has a unique activity ID.
Participants are associated with an activity through mobility activities recorded in My projects. You must therefore add activities to your project before adding mobility activities, as you will need to associate each mobility activity to an activity.
Our example below shows how to complete the Activities section in your project using a Mobility of youth workers (KA153-YOU) project.
For a quick overview of Activities in Beneficiary module, please view the eLearning video.
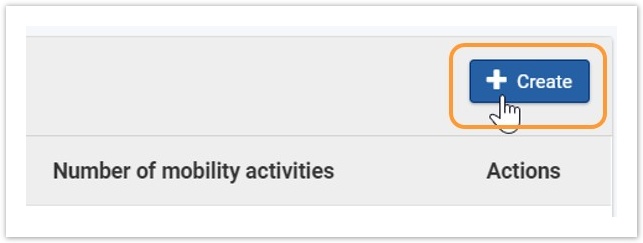
In your project, click on Activities in the Content menu. The List of Activities is displayed. All the activities that you add will be shown here. At first, the list is empty.
Note: You can only add a Preparatory Visit once you have added and detailed the associated activity. Once you have added mobility activities to the project, you will be able to see the number of mobility activities associated with each activity in this list.

Click on the Create button in the top right corner of the list to open the Add an activity screen.
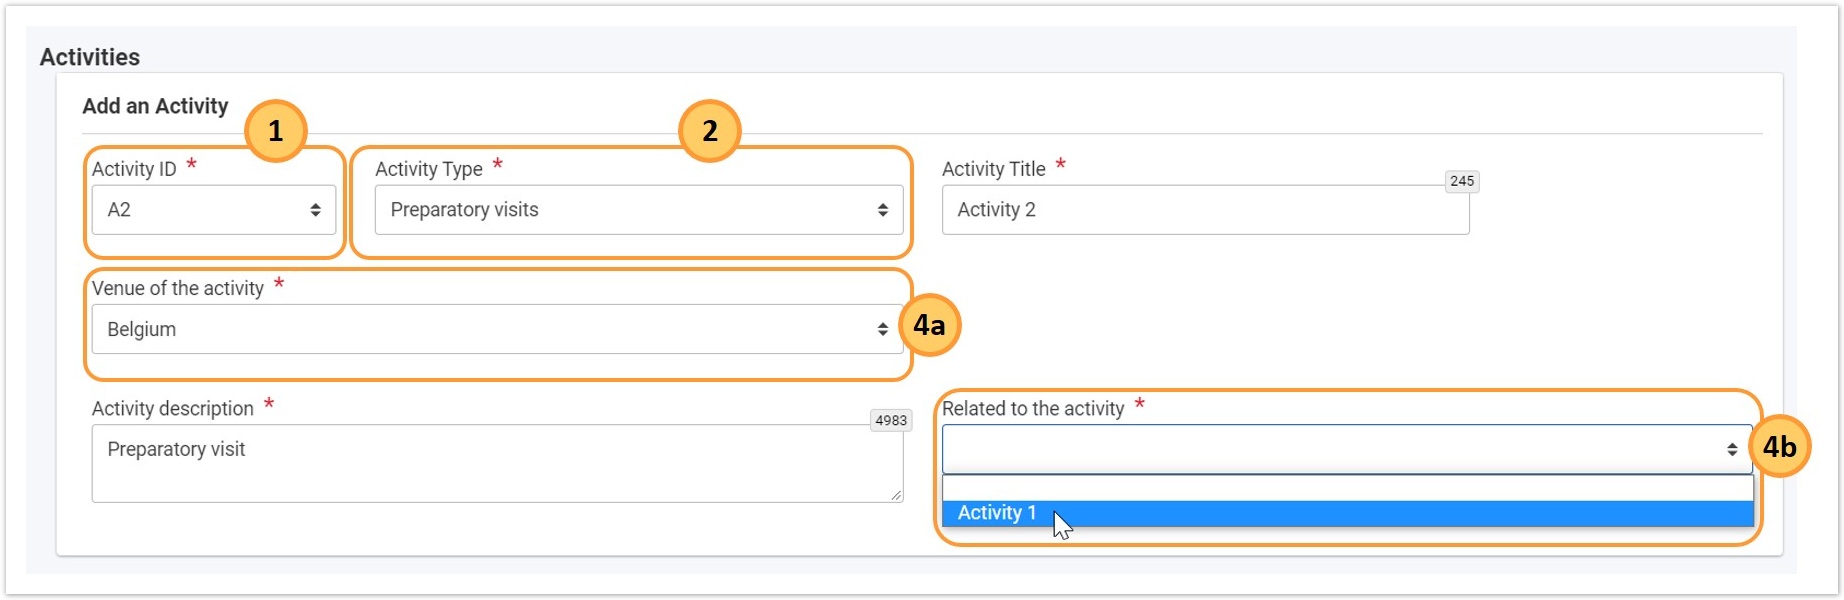
In the Add an Activity screen fill in the fields as required. All fields are mandatory and are marked with a red asterisk (*).
Some fields differ according to the key action of your project.
Note the following:
Here is an example of adding an activity of type Professional development activities - Programme Countries:

Here is an example of adding an activity of type Preparatory visit:
Once you have filled in all the mandatory information, the Save button in the bottom right corner of the screen becomes available. Click the Save button to save the activity details for your project.
A success message is displayed, and you are redirected to the List of Activities, where the newly added activity is now displayed.
Note: At this point you can start adding mobility activities and associate them with each of the activities in this list. As you do so, the number of mobility activities associated with each activity will be shown here.

In the activity list, click the Edit icon next to the activity you want to modify. The Edit an activity screen opens.

In the Edit an Activity screen make the desired changes. Note that if you change the activity type, you may need to reenter some of the already provided information.
Only some details are modifiable. In our example we have changed the activity title.

Click on the Save button in the bottom right corner of the screen. A success message is displayed, and you are redirected to the Activities list, where you may see the updated details of the activity, depending on your changes.

If you do not wish do update the activity details, you can return to the List of Activities by clicking on Cancel in this screen or clicking directly on Activities in the Content menu. Any changes you may have made to the activity details are lost.
In the activity list, click the Delete icon next to the activity you want to delete. The activity is immediately deleted (no confirmation required) and a success message is displayed.
Only activities that are not linked to preparatory visits or mobility activities can be deleted.
