Welcome
Take note
The illustrations in the Application Forms wiki pages are for consultation purpose only and may not always reflect the latest implementation.
There may be minor changes to the screen appearance and layout which are described on the updated page: How to complete the application form.
In the Activities section of the application form you are asked to provide details about the activities you plan to organise.
Activities can be for Learner Mobilities and/or Staff mobilities, optionally also associated System development and outreach activities.
You must first define each activity and provide activity details, then make request(s) for foreseen exceptional costs. If System development and outreach activities is planned, you must also explain the planned work.
Cumulative figures for activities and exceptional costs are available after completion.

Take note
Questions or fields may vary depending on the action you apply for. Please read the onscreen information carefully to complete the relevant fields and sections.
Click on Activities in the Content menu. The Activities screen opens with List of activities.
Additional information is available in an Information box in this screen to assist you. Read the information carefully.

Scroll down to Activities after the Information message.
At least one activity must be added in your application.
For each activity you add, you must provide information in all fields that are marked as mandatory, with a red asterisk (*).


First, you must select the Activity Type from the available drop-down list.
The activity types listed below may be implemented in KA151:
Information
You can only select System development and outreach activities if you have already added an activity for either Professional development activities - Member States and associated countries or Professional development activities - third countries not associated.
Take note
The activity types you select must be linked to the Activity plan defined in your KA150-YOU Accreditation. You can view the Activity Plan in the Objectives and activity plan section in your KA151-YOU form. If you plan to implement activities which are not in your Activity plan, please contact your National Agency.
For example, if in the activity plan only Learner mobilities is defined, then only the activity types Youth exchanges - Member States and associated countries and Youth exchanges - third countries not associated will be available for selection.

Complete the other fields available for the activity in the table. The following information may be required, depending on the Activity type selected. Mandatory fields are marked with a red star.
Her are examples of completed activity types:
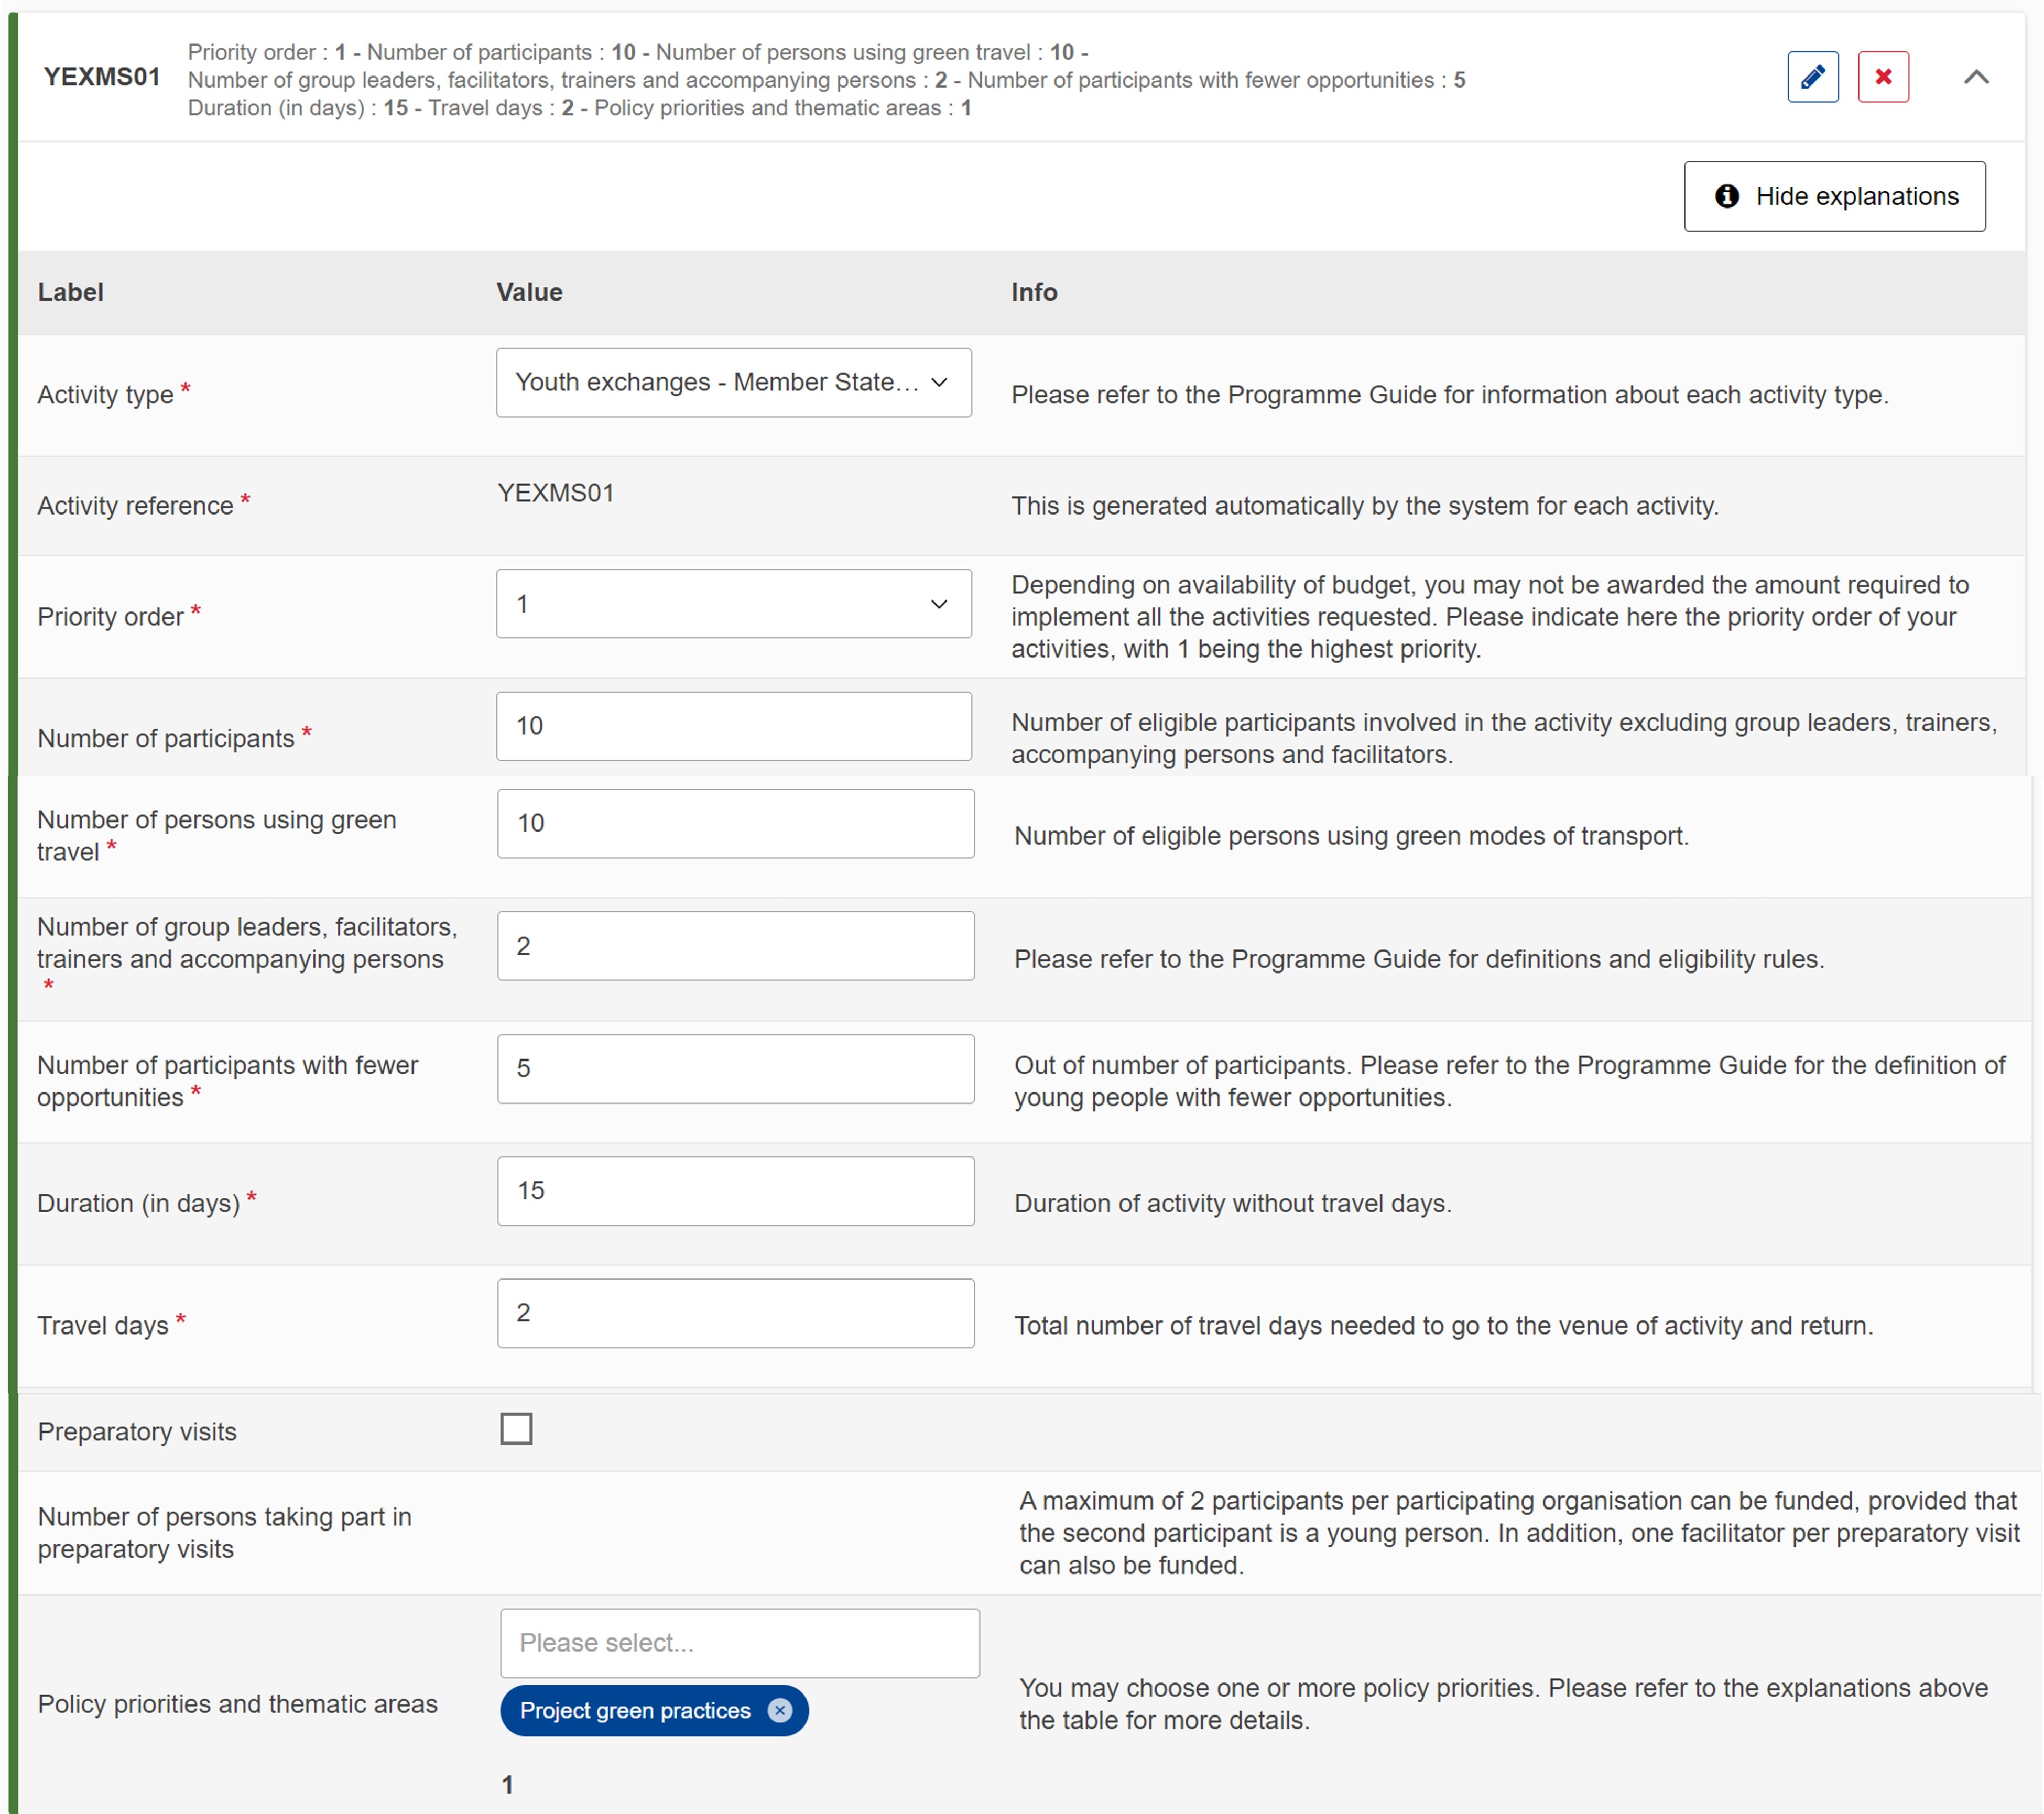


The card header for each activity displays key figures as specified in the details.
You may collapse the details of the activities to have a better overview of the totals. The card including the totals for all planned activities is located at the bottom of the activity list.

You have the option to request coverage for Exceptional costs and Inclusion support for participants, if applicable to your foreseen activities.
As opposed to standardised unit costs applicable for other types of costs, these budget categories are funded based on actual expenses. These non-standard costs require specific description and justification in order to be approved.
Before making a request, please read the introduction text and the funding rules in the Programme Guide to make sure the type of expense you are requesting is eligible.
Each cost item is displayed as a card, with the main information in the header and the details specified in an expandable / collapsible section.
You can expand or collapse the details for a cost item by clicking the Edit (pen) icon or the arrow to the right in the card.
You can hide the Explanations column which provides guidelines for each field by clicking the Hide explanations button.
To add a request for exceptional costs or inclusion support, do the following:
Click the Add a cost item button at the bottom of the Activities screen. A card is created, which has a red vertical line at the left, indicating that required information is missing or incorrect. When all mandatory fields have been correctly completed, the line changes colour to green.

In the card, provide the required information. Depending on the type of cost requested, some or all of these fields must be completed:
The Eligible amount (EUR) is calculated automatically based on the Estimated costs (EUR) and the Support rate (%) and is read-only. The support rate depends on cost type and the activity type.

Once all cost items have been added, the overview of the individual costs and a Total.

If you added an activity of type System Development and Outreach activities, you must provide additional information in the System Development and Outreach activities subsection, located at the bottom of the screen, below the exceptional costs and inclusion support cards.
Provide the required information in the available fields.

To update an activity or a cost item, simply scroll to the relevant card in the specific subsection and make the required changes.
To delete an activity or a cost item, click on the Delete (red X) icon in the header for the activity or cost item to remove. Confirm the deletion by clicking on Delete in the confirmation pop-up window.

Once you have correctly completed all sections and subsections, the number of planned activities is displayed in the Content Menu and the section is marked with a green check.
