Welcome
Erasmus+ and European Solidarity Corps IT Documentation wiki is a part of NAconnECt.
This wiki provides Applicants and Beneficiary Organisations with documentation and training material for IT tools and project management, involved in Erasmus+ and European Solidarity Corps projects managed by National Agencies. It gives you access to documentation about the IT systems used to manage Erasmus+ and European Solidarity Corps projects.
This page explains the basic functionalities and set up of the Erasmus+ and European Solidarity Corps IT Documentation wiki.
Welcome page |
|---|
The Welcome page offers links or buttons to help you navigate to the most relevant IT Documentation for Erasmus+ and European Solidarity Corps programmes. Jump to the relevant guide by clicking on the corresponding labelled button. Please note that the diagram displays by default the Erasmus+ grant process. Use the tabs to switch between the grant process diagrams for Erasmus+ programme or European Solidarity Corps programme (1). Click on the button with the name of the IT tool to open the corresponding guide, in the process diagram (2). Click on one of the quick access links to open Applicant Guides, Beneficiary Guides, New Pages and to this page, How to use the wiki (3). |
|
Example: Click on the tool name to access the tool specific user guides
Example: Using the direct link to access the Beneficiary Guides
|
Main page sections |
|---|
When opening the Erasmus+ and European Solidarity Corps IT Documentation (Wiki), the Welcome page is displayed. From here you can access information on the IT tools used. This wiki has following main sections:
Clicking on the Erasmus+ icon |
|
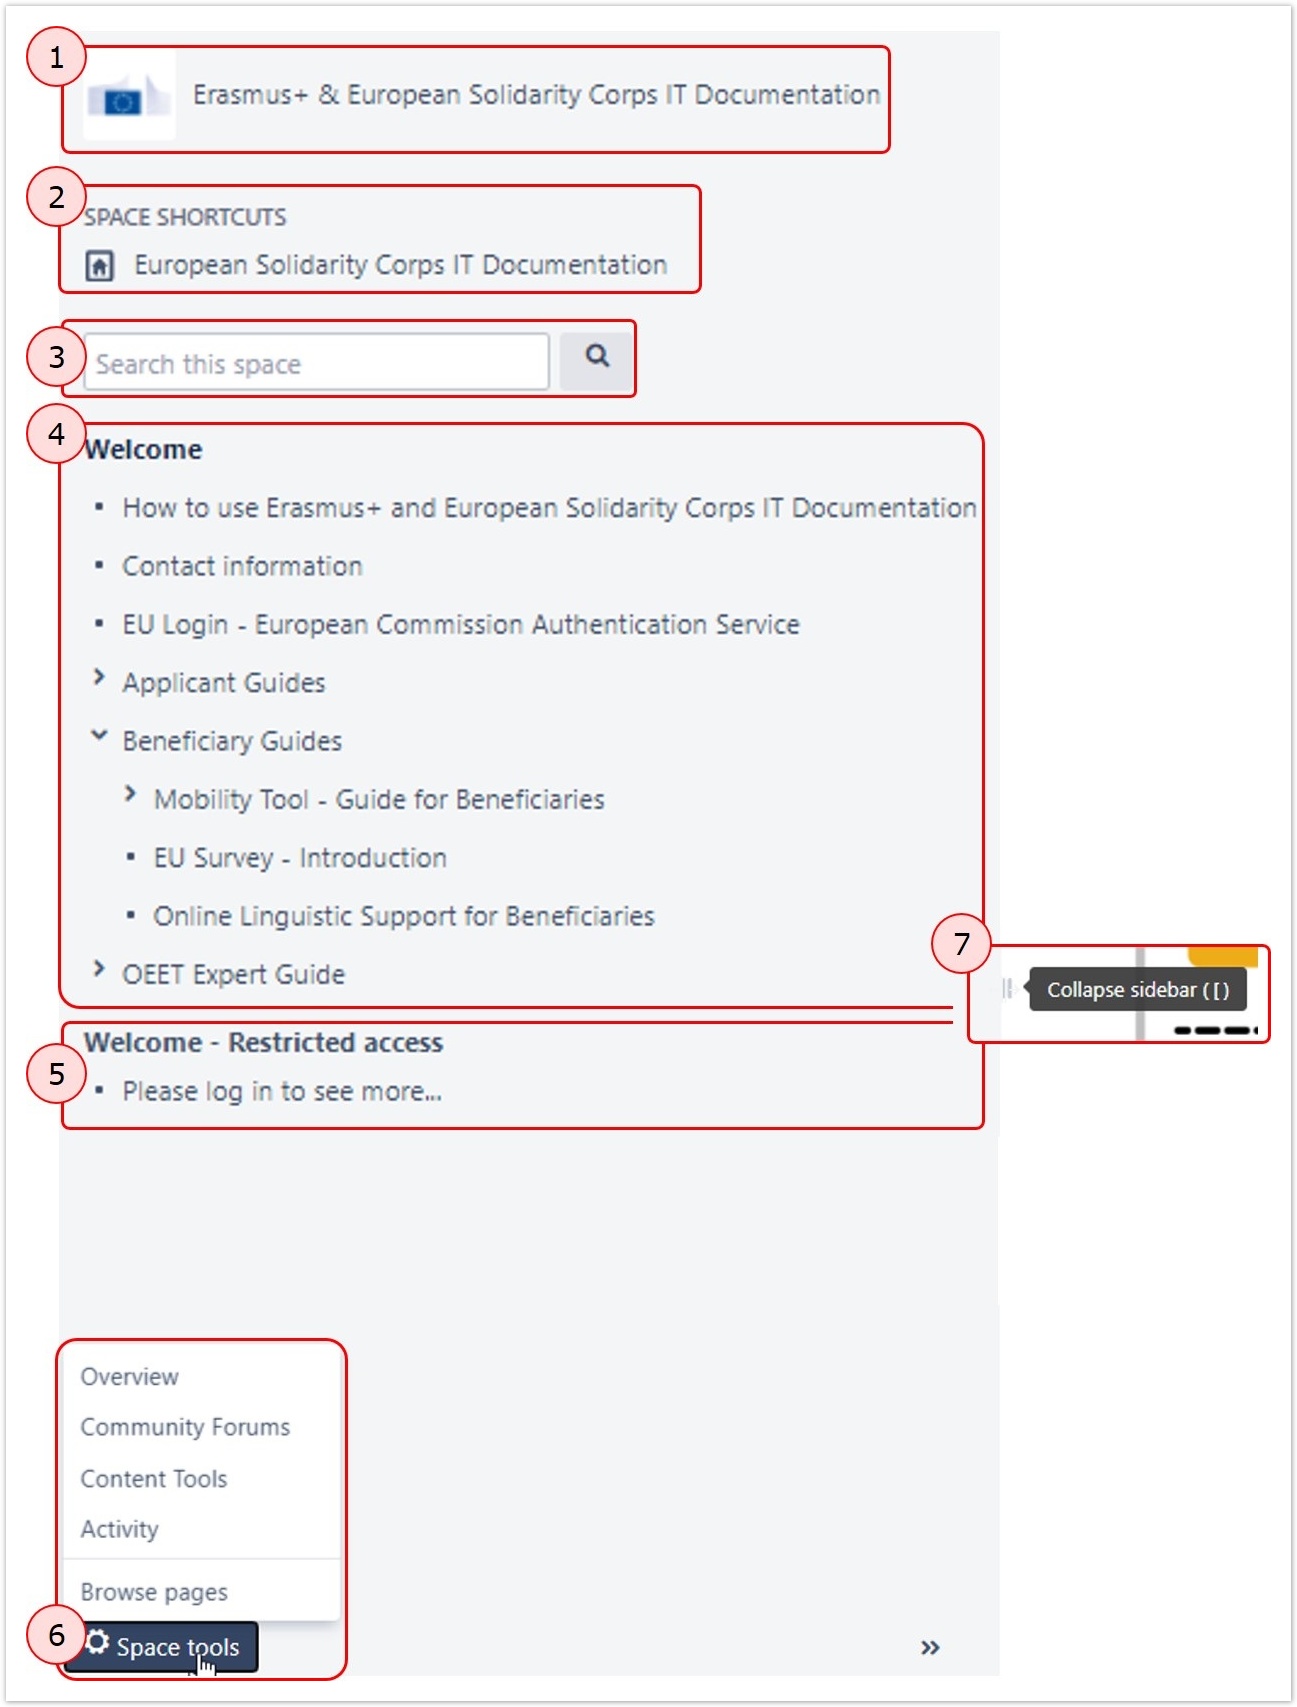
Navigation pane/Side bar |
|---|
The Navigation pane on the left hand side offers a variety of functionalities.
|
|
Search Functionality |
|---|
The Search functionality helps you to find specific information quickly.
|
|
Within the Search results screen you see the following:
|
|
Page content |
|---|
Within Erasmus+ and European Solidarity Corps IT Documentation, there are a number of different types of pages. For example:
|
Depending on the type of page, they may have slight variations in layout and/or design, but the main functionalities and the basic set-ups are similar. The example below shows a typical How to page. On this wiki page you will find:
|
|
"Pages" functionality |
|---|
The Pages option will provide you quick access to an overview of
The pages option is available via the breadcrumbs on top of all wiki pages. |
|
"Help" functionality |
|---|
| The wiki is created using the Confluence tool. The Help icon provides information regarding Confluence and is not relevant for applicants or beneficiaries. If you need help with the content of the wiki or if you have questions concerning the tools, please contact your National Agency. |
|
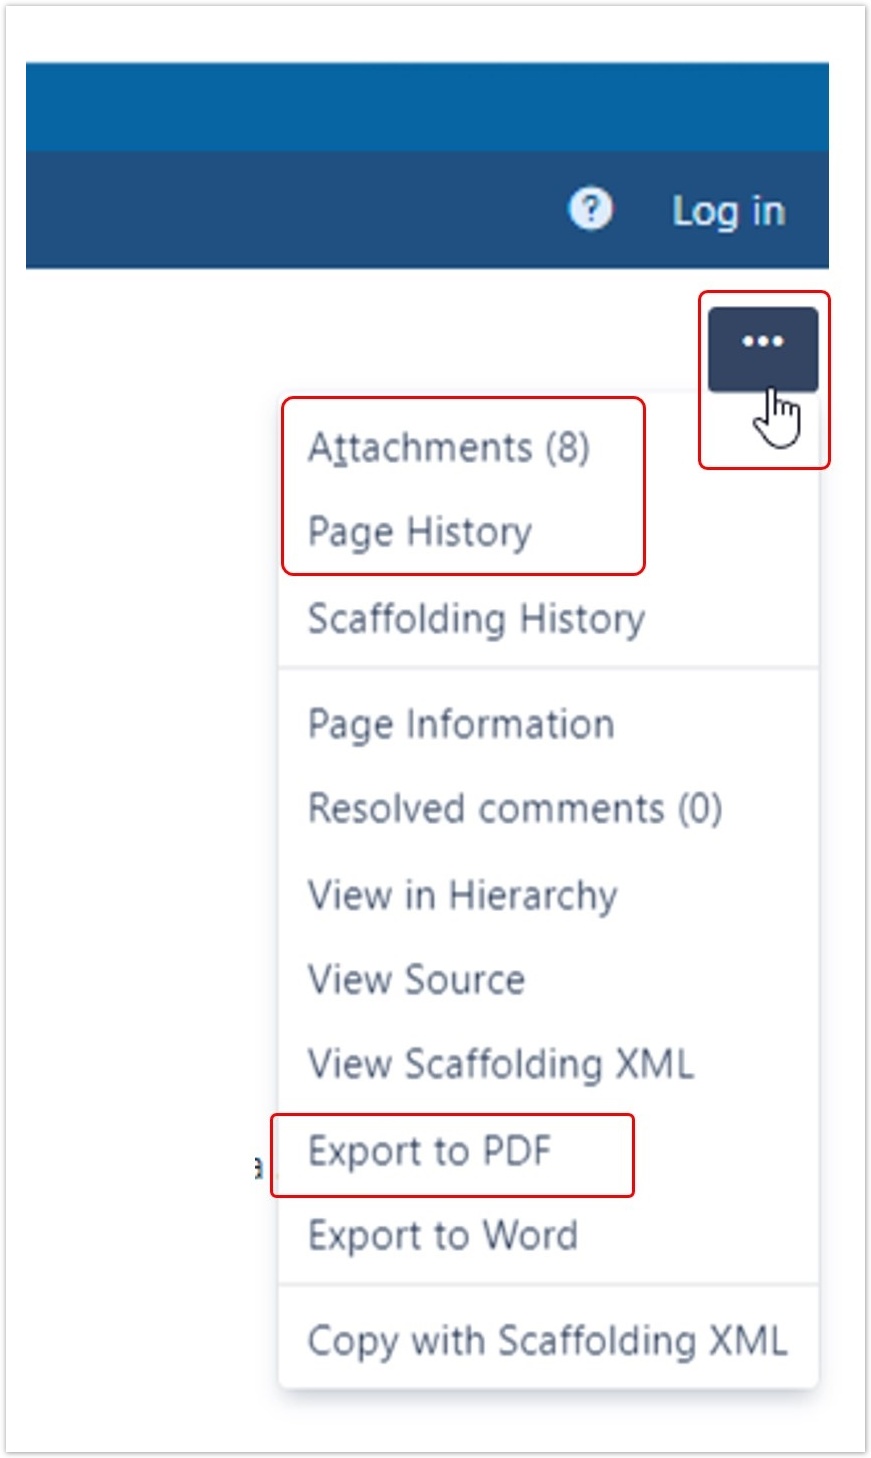
"More options (...)" icon |
|---|
The More options icon (three dots) provides access to a number of additional functionalities. These include:
|
|
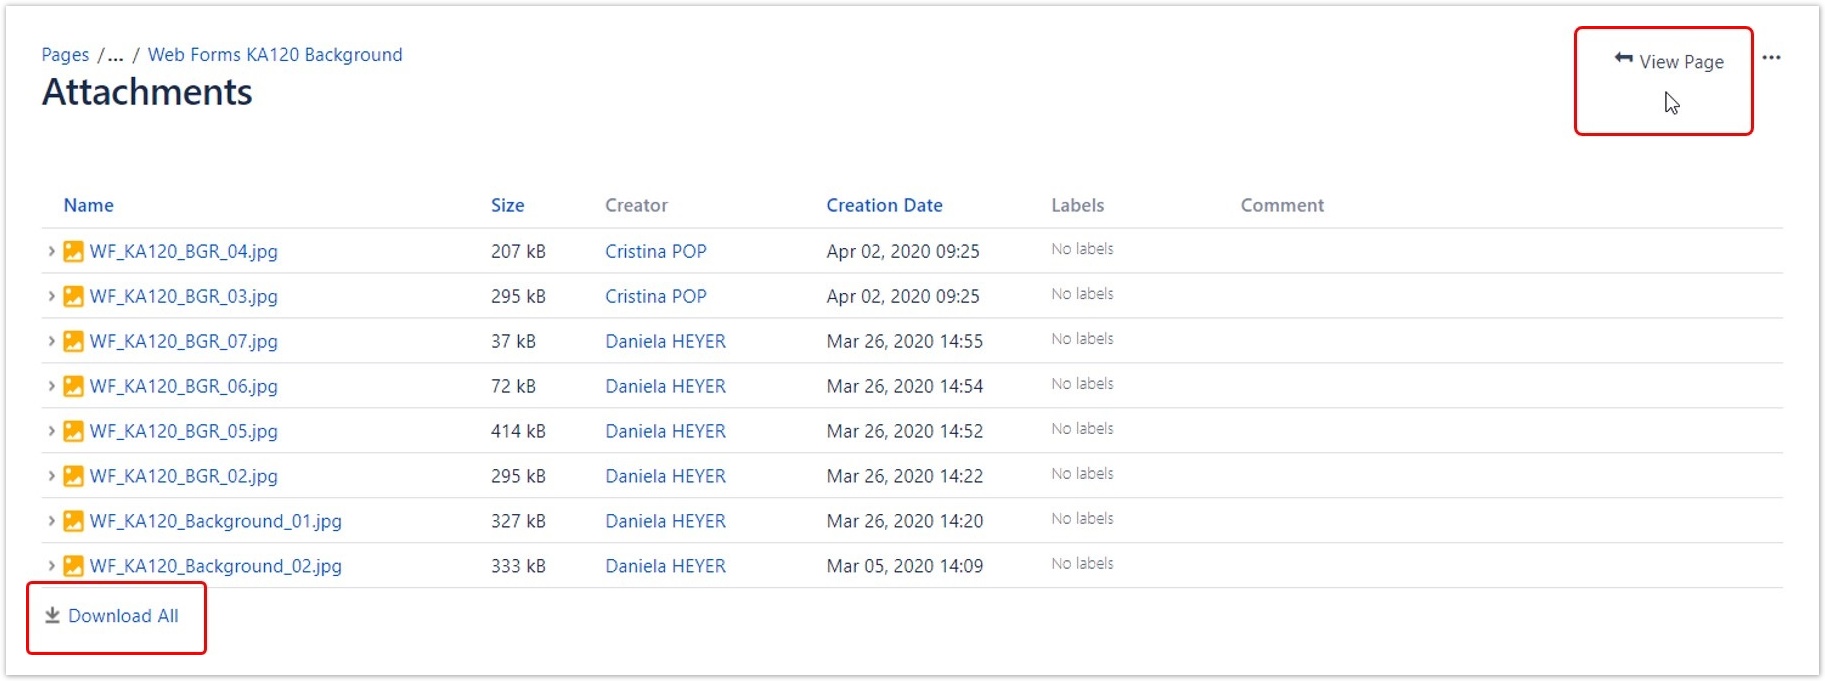
"Attachments" optionClicking on Attachments option provides you with a list of all attachments such as screen captures, or files attached to the wiki page. You may find that not all attachments are useful to download, as the attachments include the screen captures used on the page.
|
"Page History" optionThe Page history option provides a list of versions of the given wiki page. If you select two versions via the check boxes, it allows you to compare these two versions of the page.
If you just click on a version in the list, the system will display that version. A message is displayed making you aware that you are looking at an older version. It offers you the possibility to step through the various versions or to return to the current version.
|
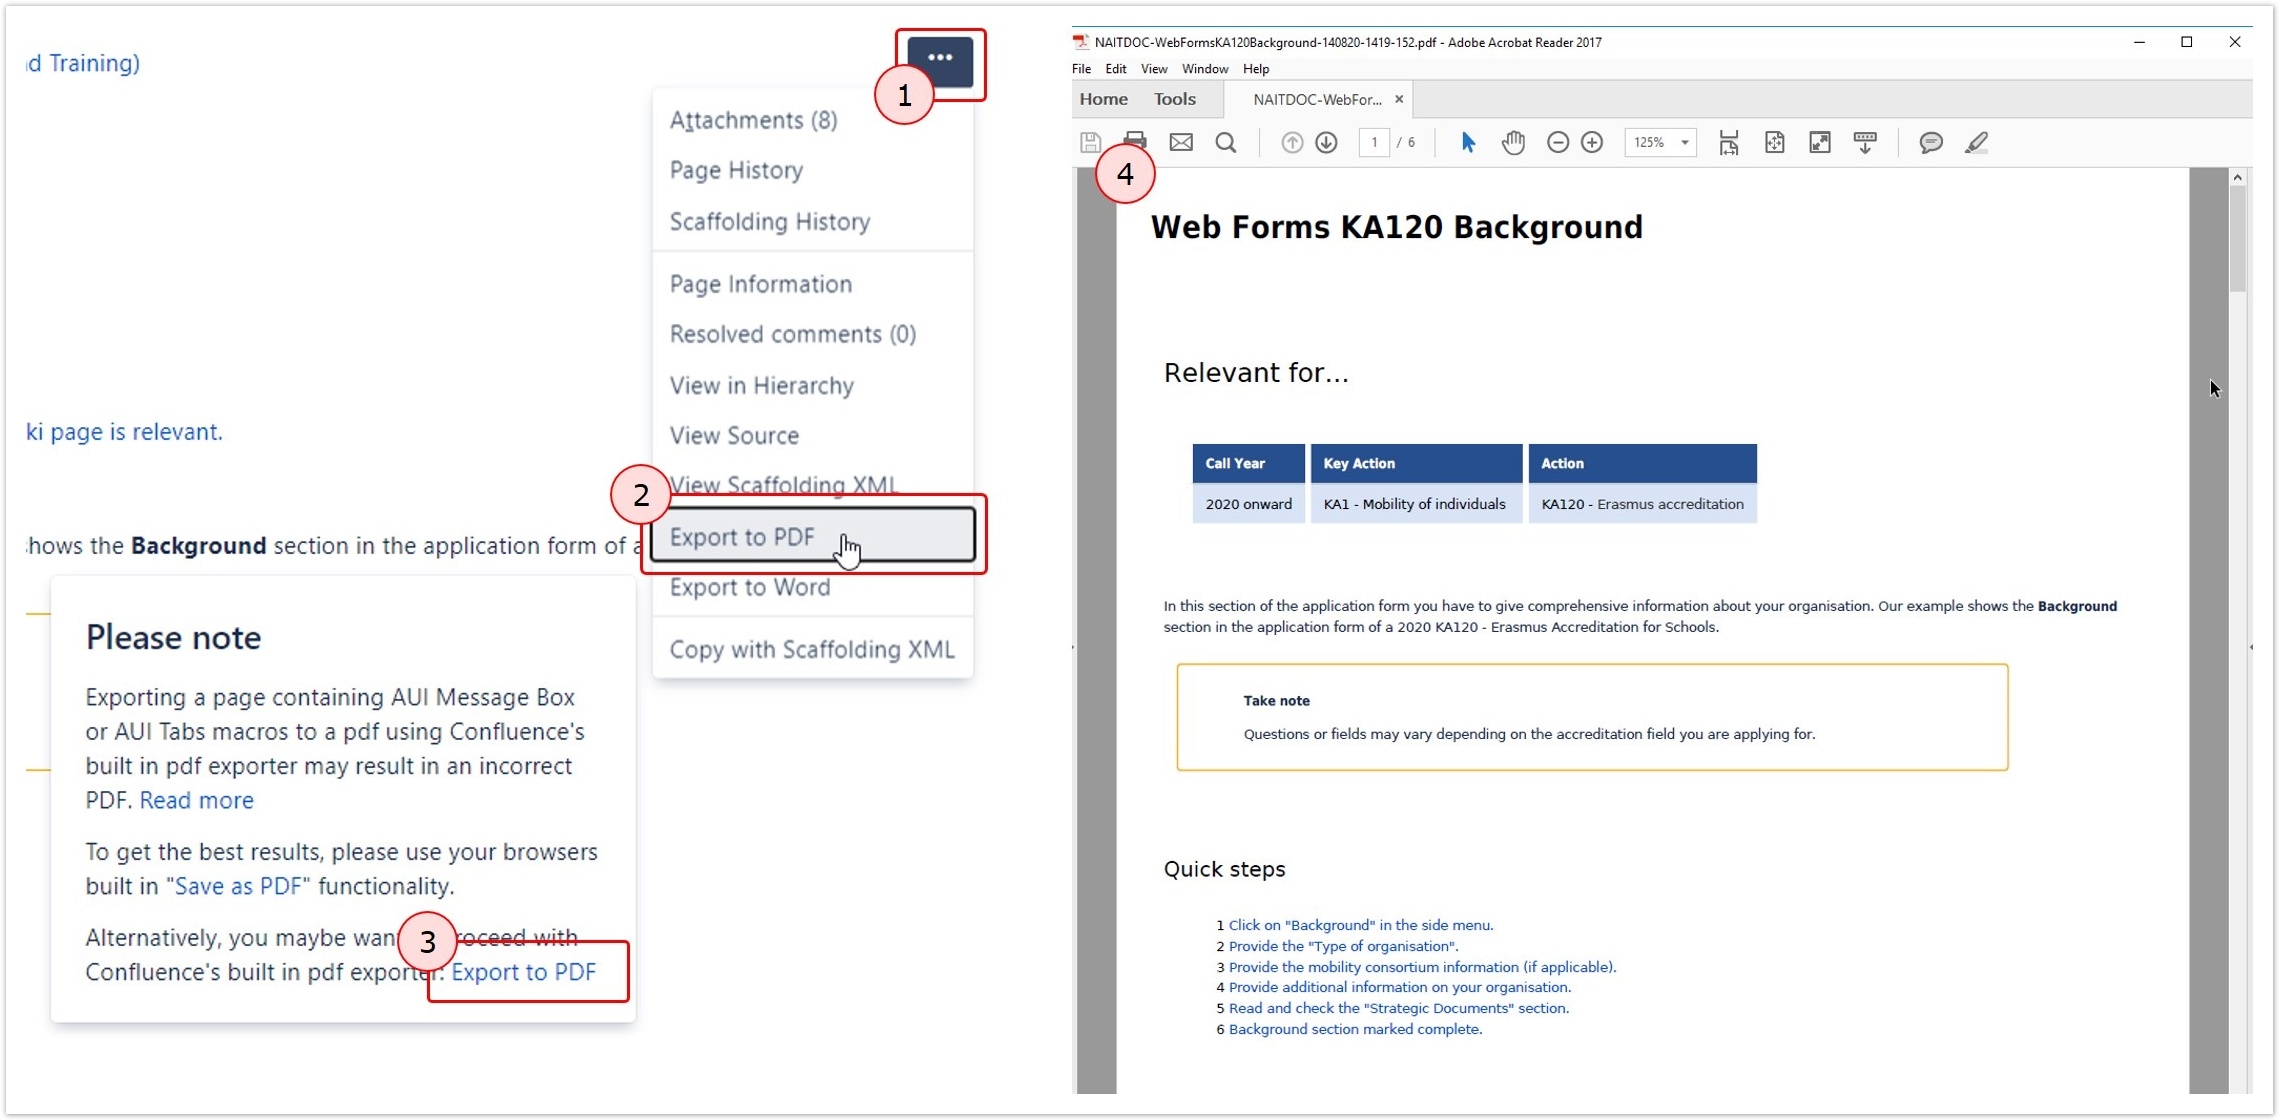
"Export to PDF" option This option will convert the current page into a PDF file which you can download and read offline. Please consider that the wiki is frequently updated. We encourage all users to reference the online version of documentation, so that you can access the most update-to-date content.
|
"Export to Word" option Export to Word is similar to the Export to PDF function but results in a MS Word document, which can be used for further processing. This option is currently not working as intended. Only text is exported in the document, hence using this option is not recommended. |
| Log in to Erasmus+ and European Solidarity Corps IT documentation |
|---|
If you have an EU login account with 2-Factor-Authentication, you can use it to login and access some additional functionalities. |
|
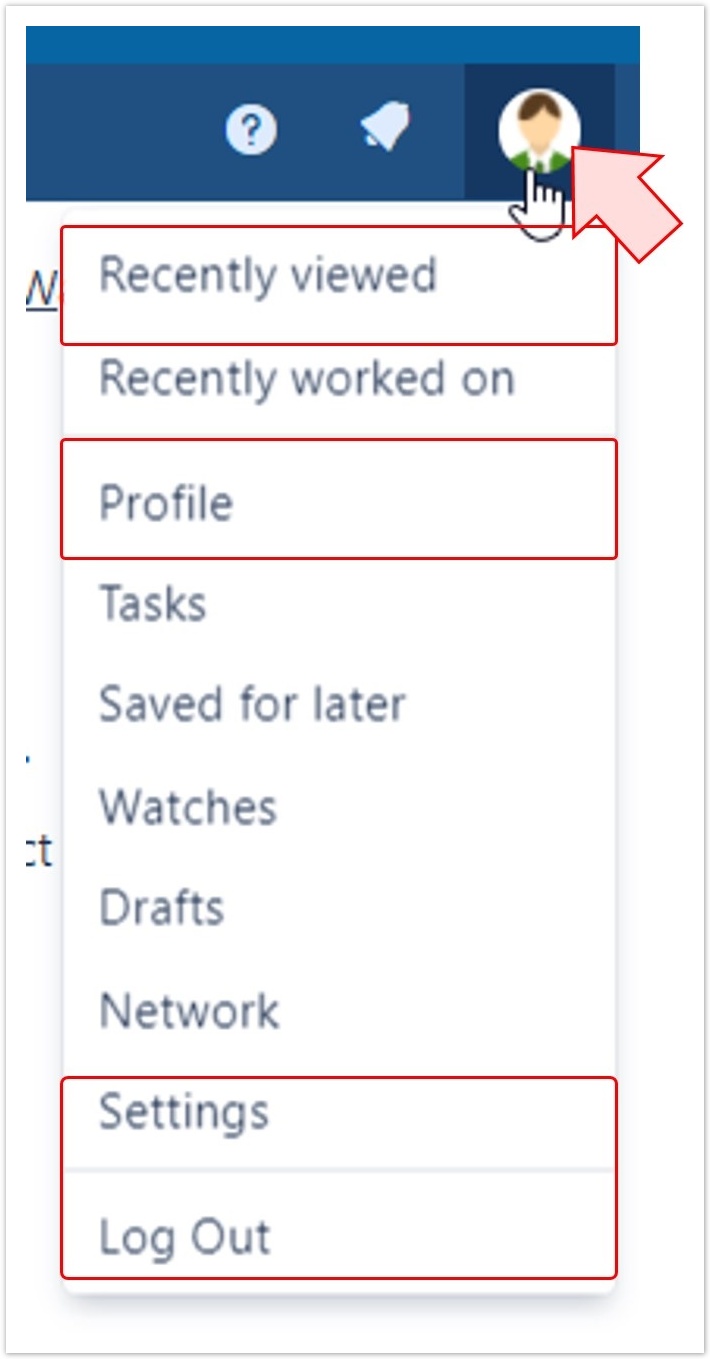
The most useful additional options available via your user avatar are:
|
|
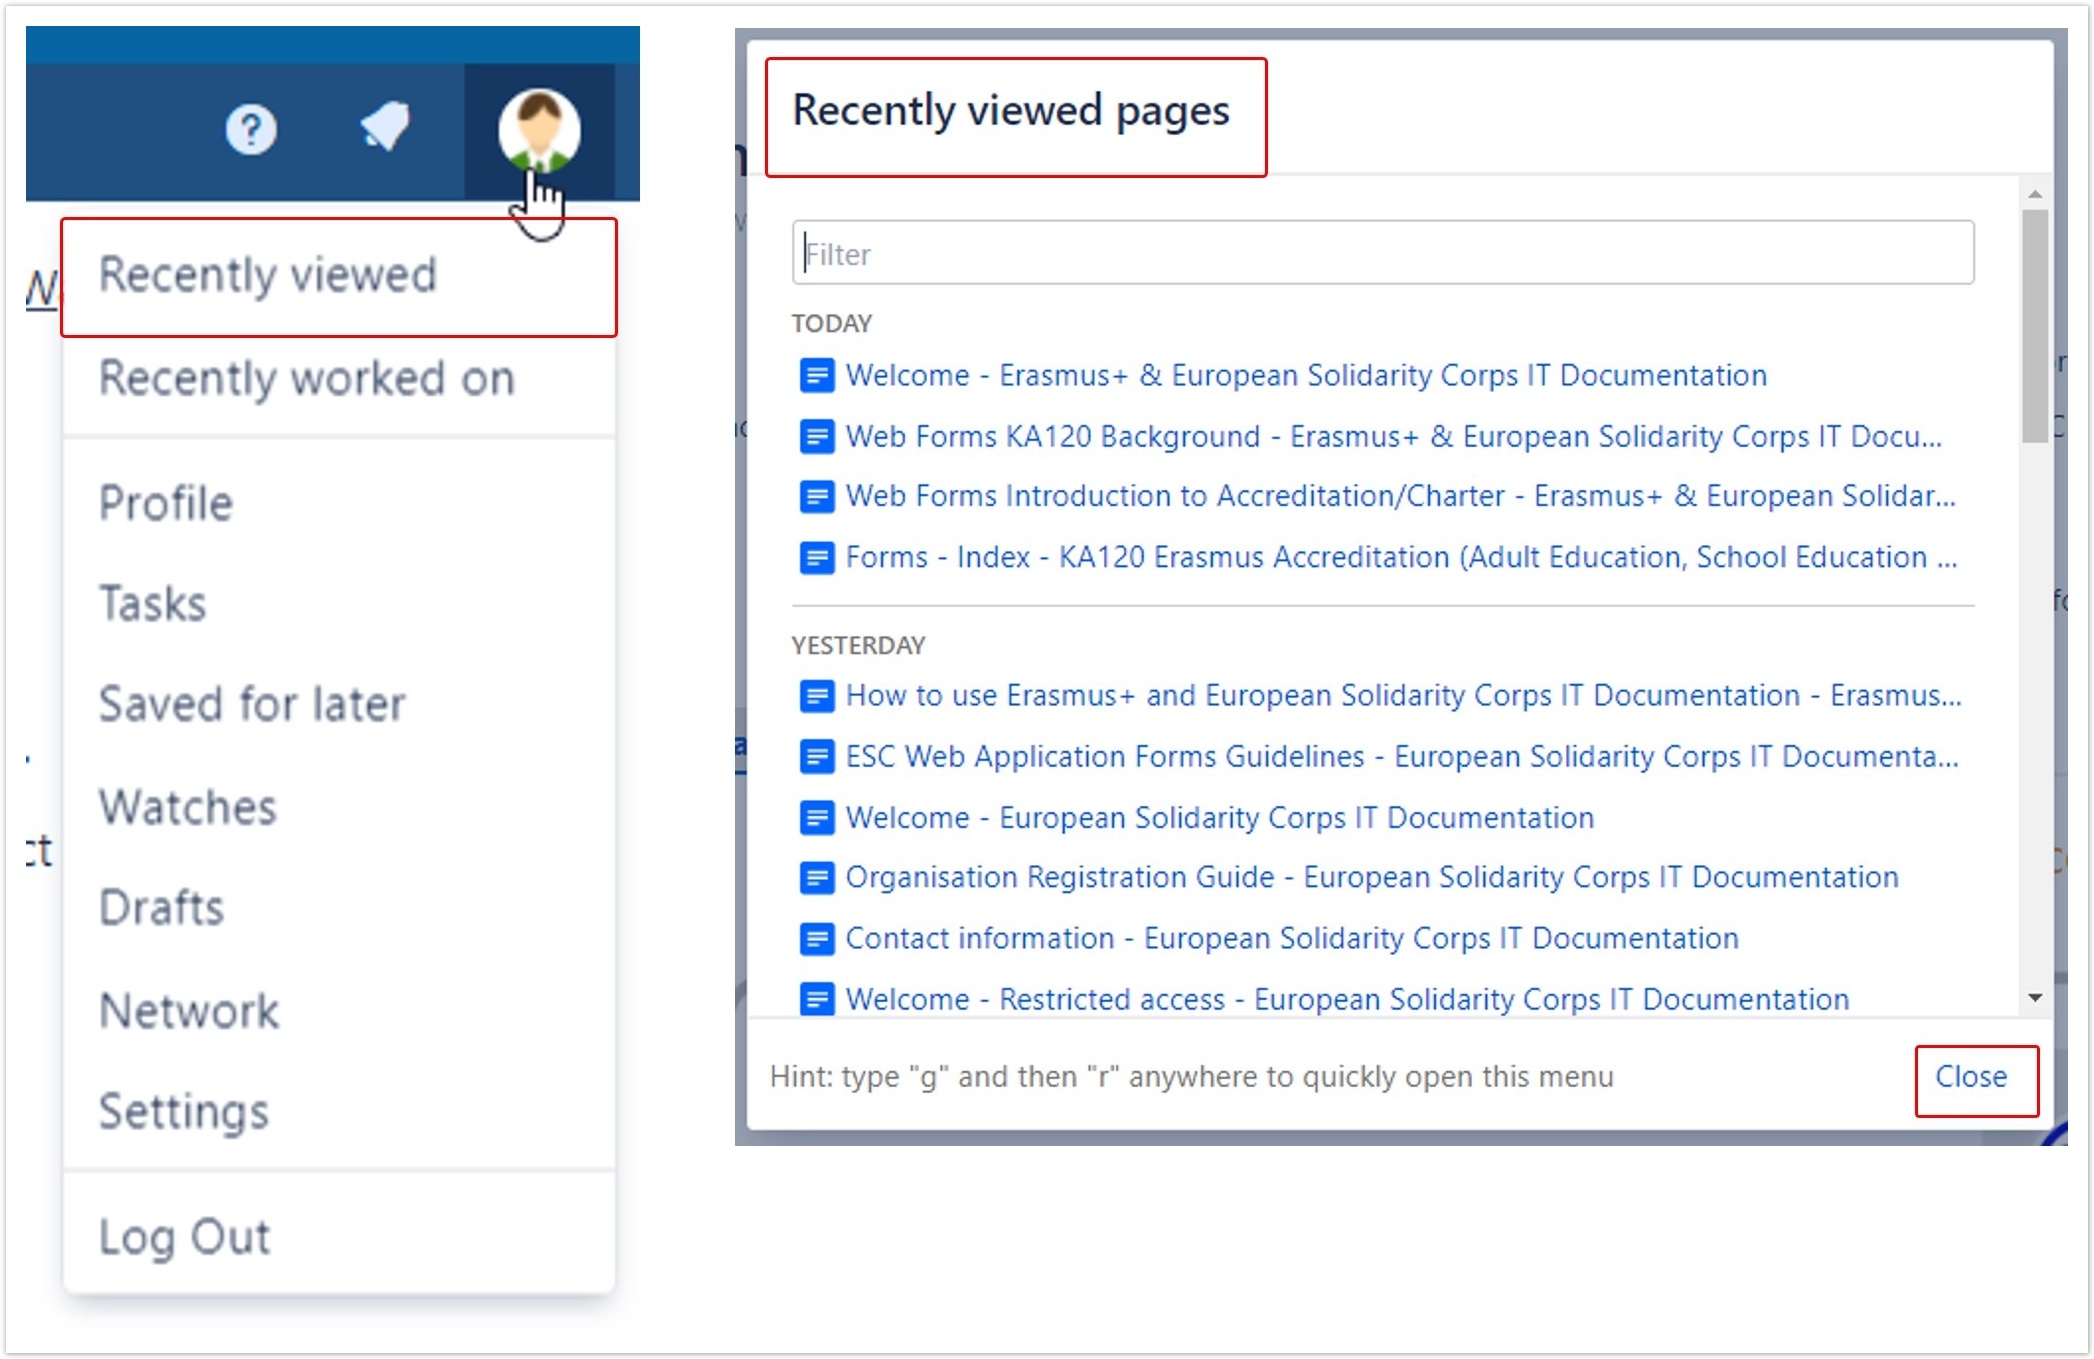
"Recently Viewed" option |
|---|
| Recently Viewed option opens an overview of recently viewed wiki pages. |
|
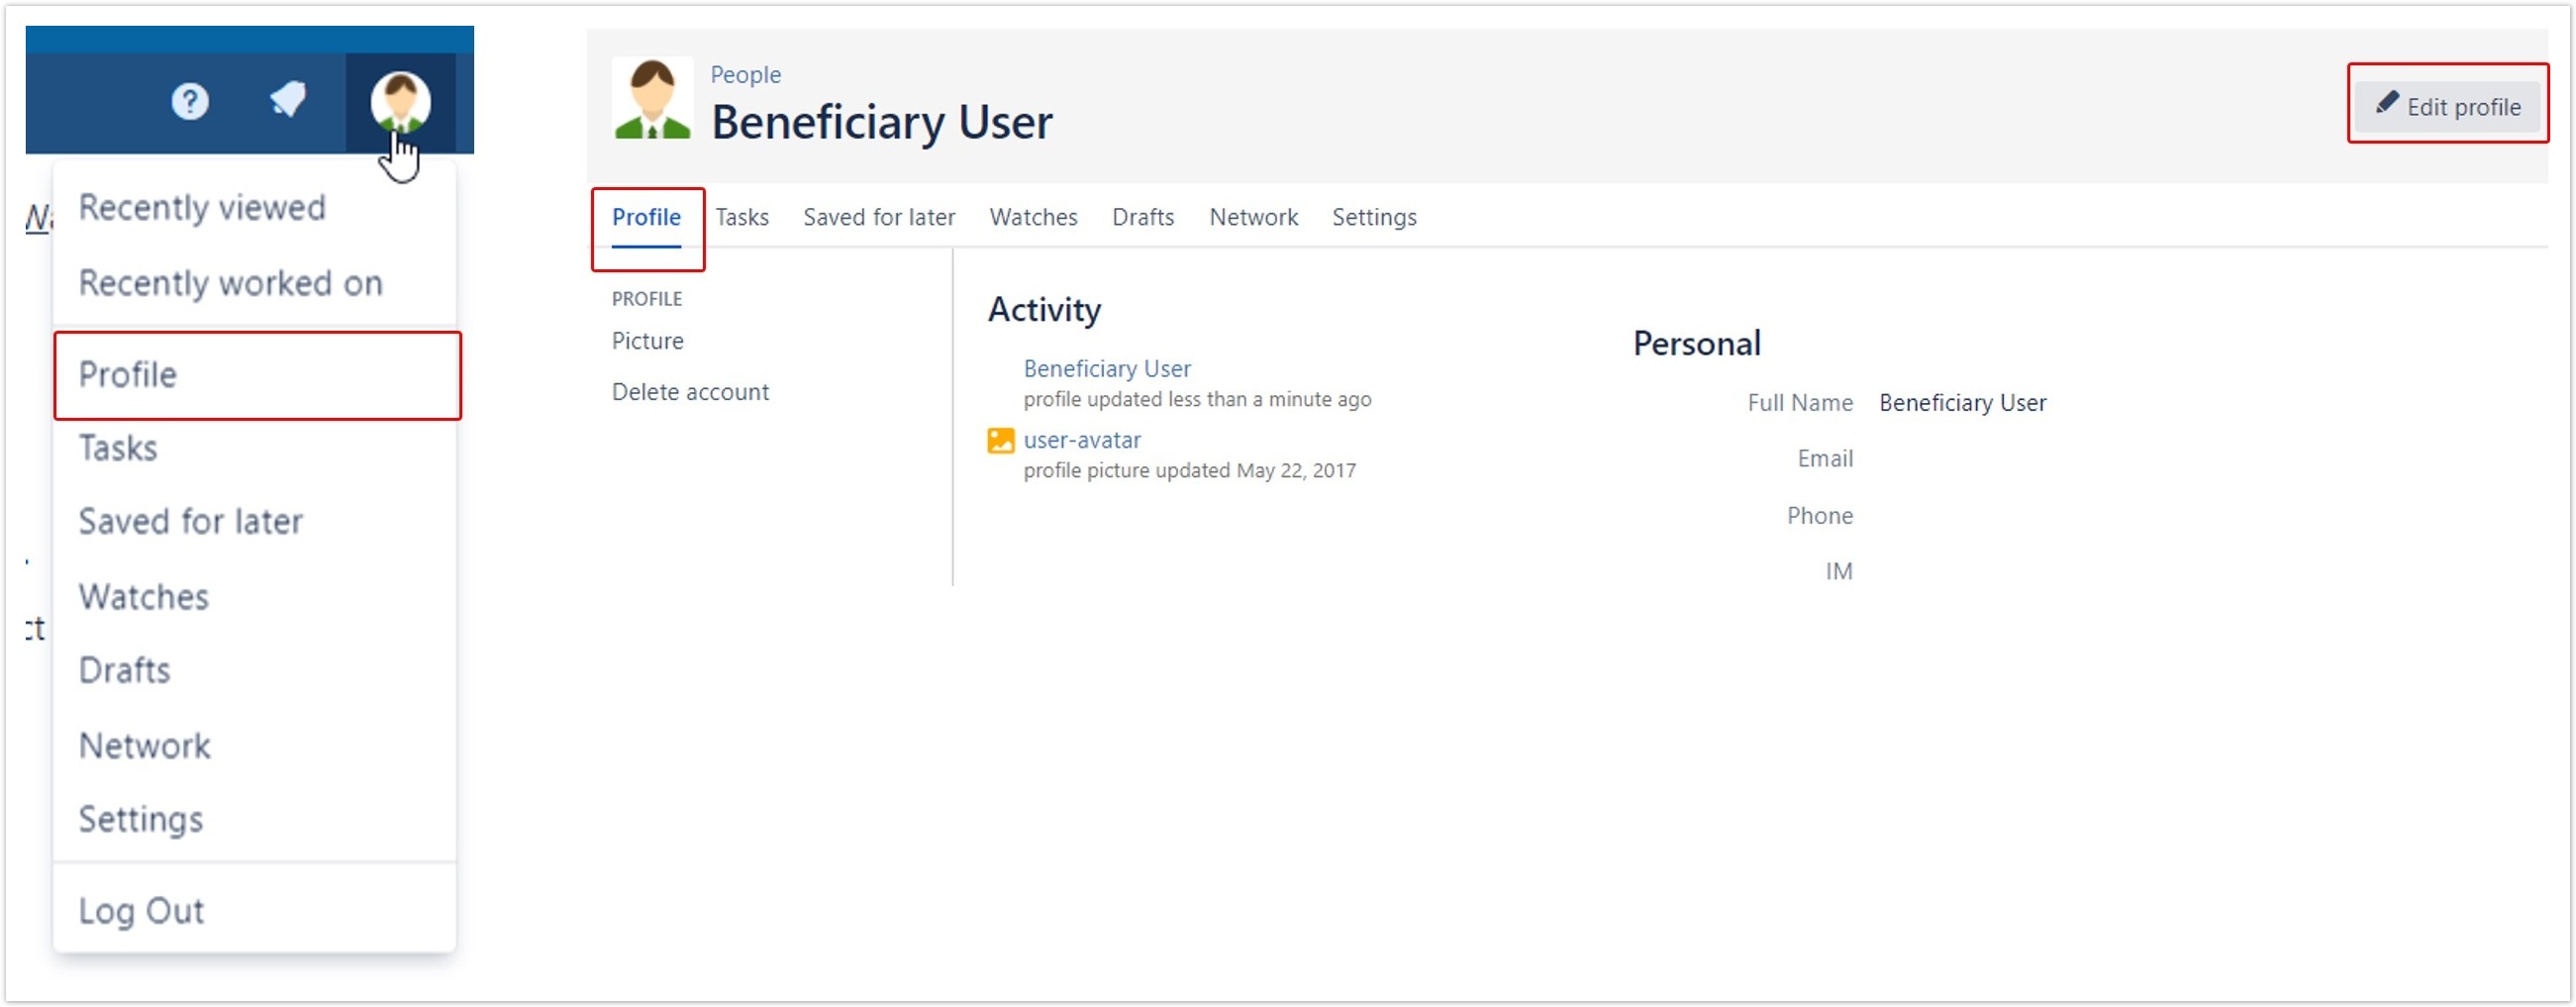
"Profile" option |
|---|
Profile option will open the settings for your profile. It is not relevant to update your details as none of your personal details are used in the wiki nor can be viewed by any other person.
|
"Settings" option |
|---|
From the Settings tab on this pane, you can check and update features.
|
"Save for later" option |
|---|
On top of all pages you have the Save for later option. This functionality can be used to create Favourites, which can be accessed easily at a later stage.
To remove a page from your saved pages access the saved page and click on the Saved for later button. |
|
"Watch" option |
|---|
If you want to be informed about changes to this wiki you can watch particular pages or the whole Erasmus+ and European Solidarity Corps IT Documentation.
There are three different settings:
|
|
To view all your watched pages, click the profile icon in the right hand top corner of the screen and select the Watches option. From this overview screen it is also easy to remove spaces and/or pages from the watch list by simply clicking Stop Watching. |
|
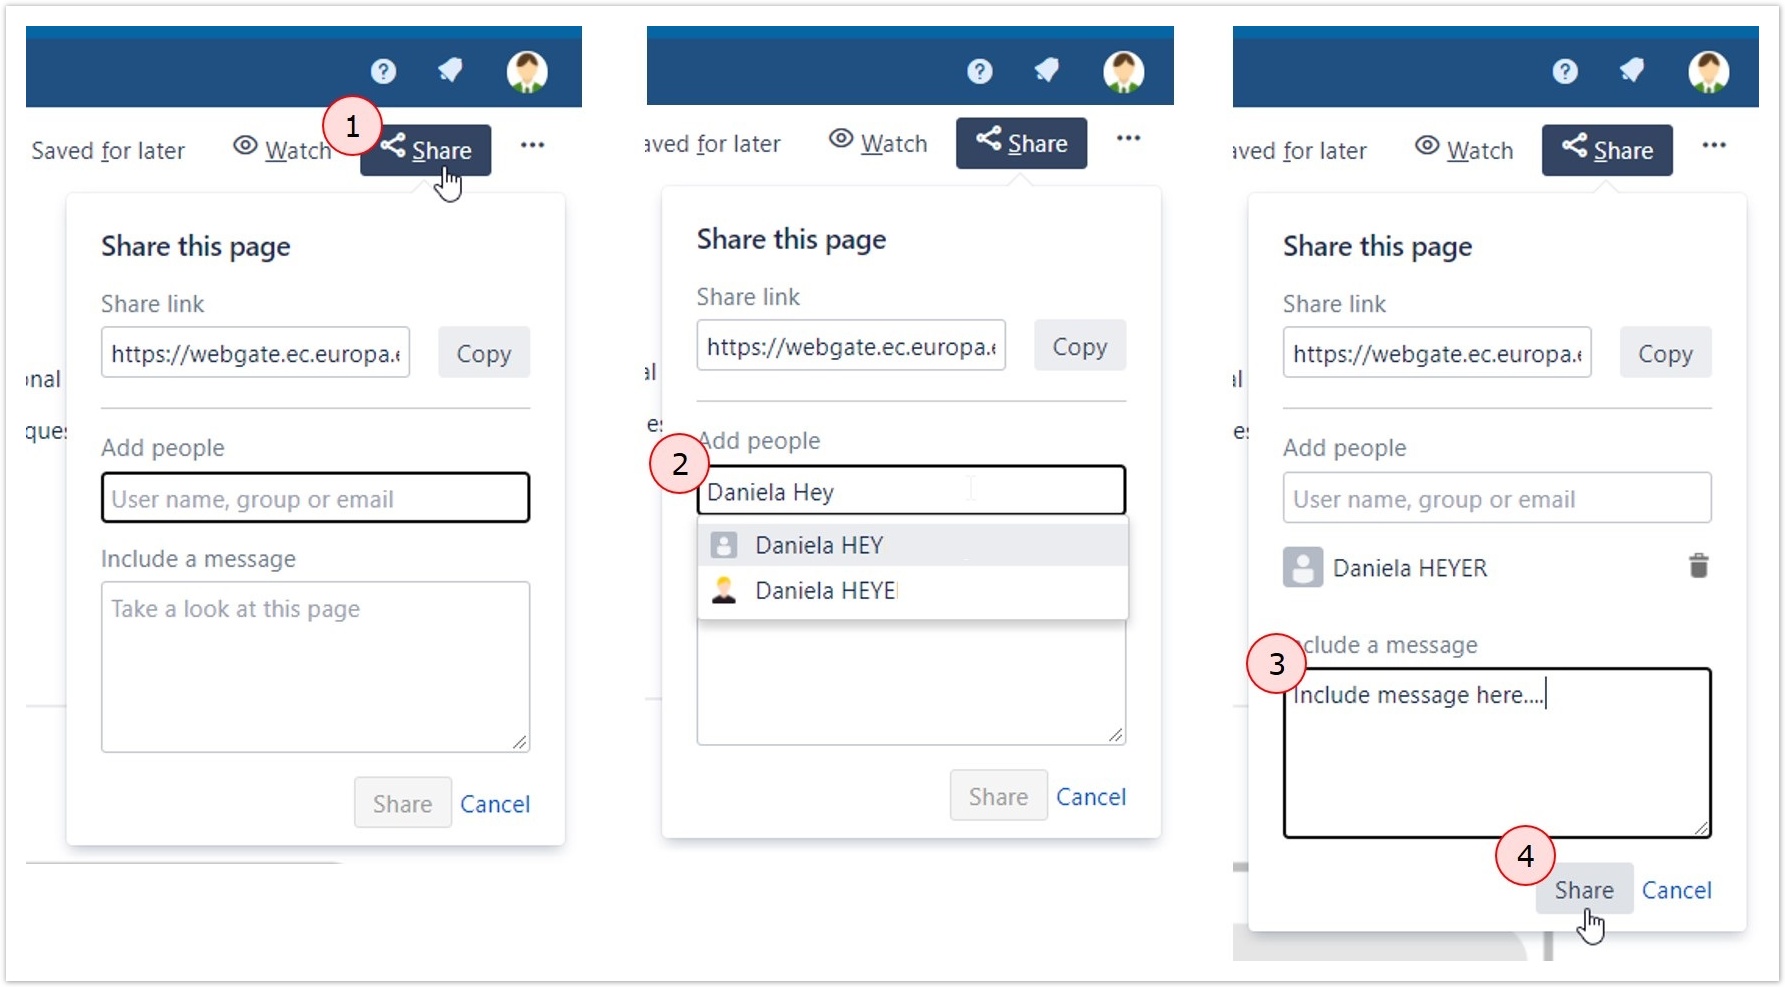
"Share" option |
|---|
You have the possibility to Share pages for instance with colleagues.
The person will receive an e-mail notification and a notification directly in the Erasmus+ and European Solidarity Corps IT Documentation, if they are logged in. |
|
Notifications |
|---|
The Bell icon displays a number if any notifications are available for you in the Erasmus+ and European Solidarity Corps IT Documentation. A number is displayed if for example a colleague shared a wiki page with you using the Share option. Clicking on the bell icon will open a summary of the notification. If you click on the summary, more details become available. In our example a page was shared and a personal message added. |
|