Click "+Create"
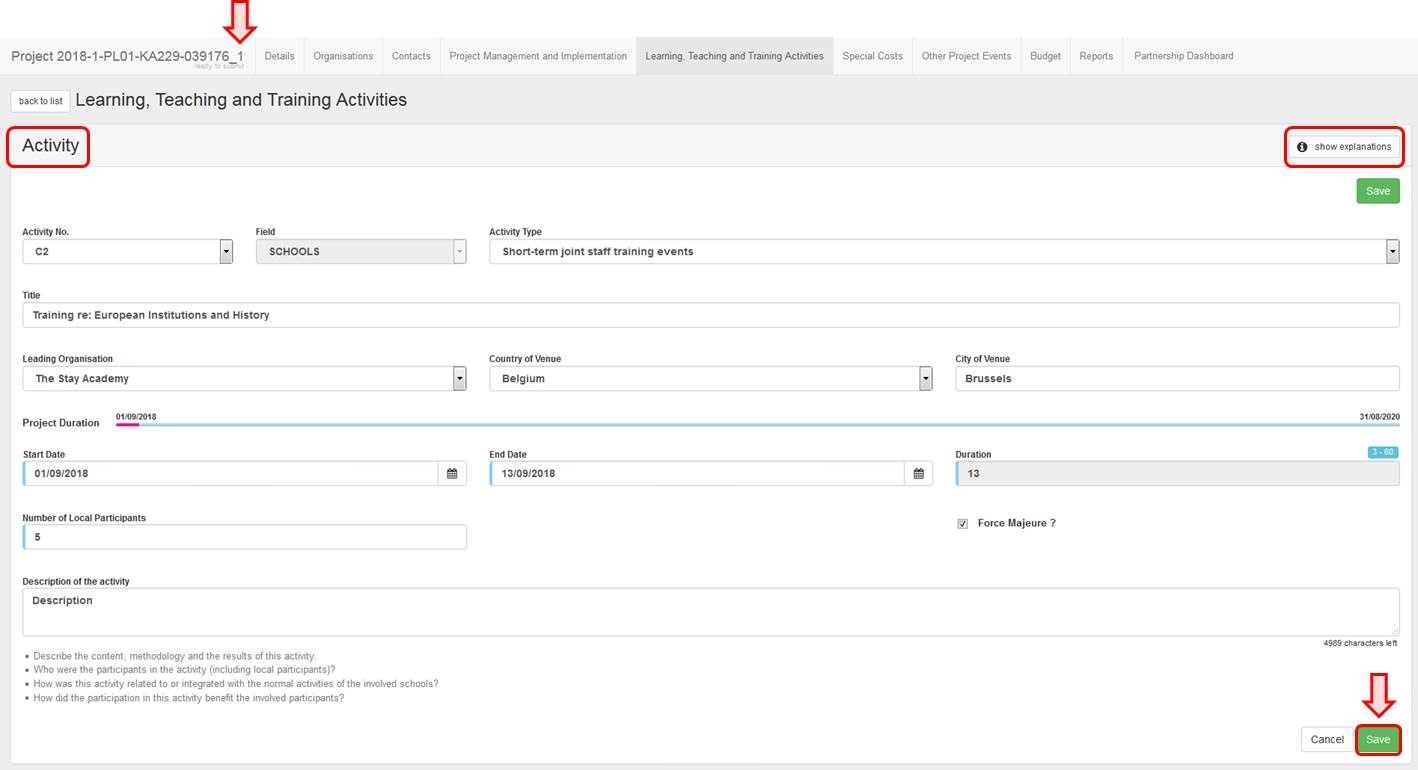
As a coordinator, click the +Create button at the top of the Learning, Teaching and Training Activities screen to open the Activity screen.

Fill in the details
Fill in the fields as appropriate. You can use the show explanations button to display or hide onscreen instructions.
| Info |
|---|
If you added any Learning, Teaching and Training Activities in your web application form, the numbers associated with those activities in the application form (for example C1, C2,..) cannot be used when selecting the Activity Number. |
Activities can only be modified by coordinators.
To start editing an activity, click the Edit icon next to it in the Learning, Teaching and Training Activities list. Make the desired changes in the Activity screen, then click Save to save the new details.
 Image Removed
 Image Added
| Info |
|---|
|
Certain fields in the activity can be changed only as long as no groups have been added to the activity. Otherwise, these fields are disabled (greyed out) and if they require changes, all groups must first be removed by the partners that created those. |
| HTML |
|---|
<div class="page-break-ruler"></div> |
Delete an activity
An activity can only be deleted by the coordinator and only as long as no groups have been added to it. If you need to delete an activity, all groups must first be removed by the partners that created them.
To delete the activity, click the bin icon next to it in the Learning, Teaching and Training Activities list.
 Image Removed
 Image Added
A pop-up dialog is displayed. Click Delete to remove the activity.
| HTML |
|---|
<div class="page-break-ruler"></div> |
Add groups to an activity
Click "View" at activity level
If you are in the activity list, click the View icon next to the activity item you wish to open.
 Image Removed
 Image Added
If you are already in the Activity screen, proceed to the next step.
Click "+Create"
At the bottom of the Activity screen, click the +Create button to open the Group screen.
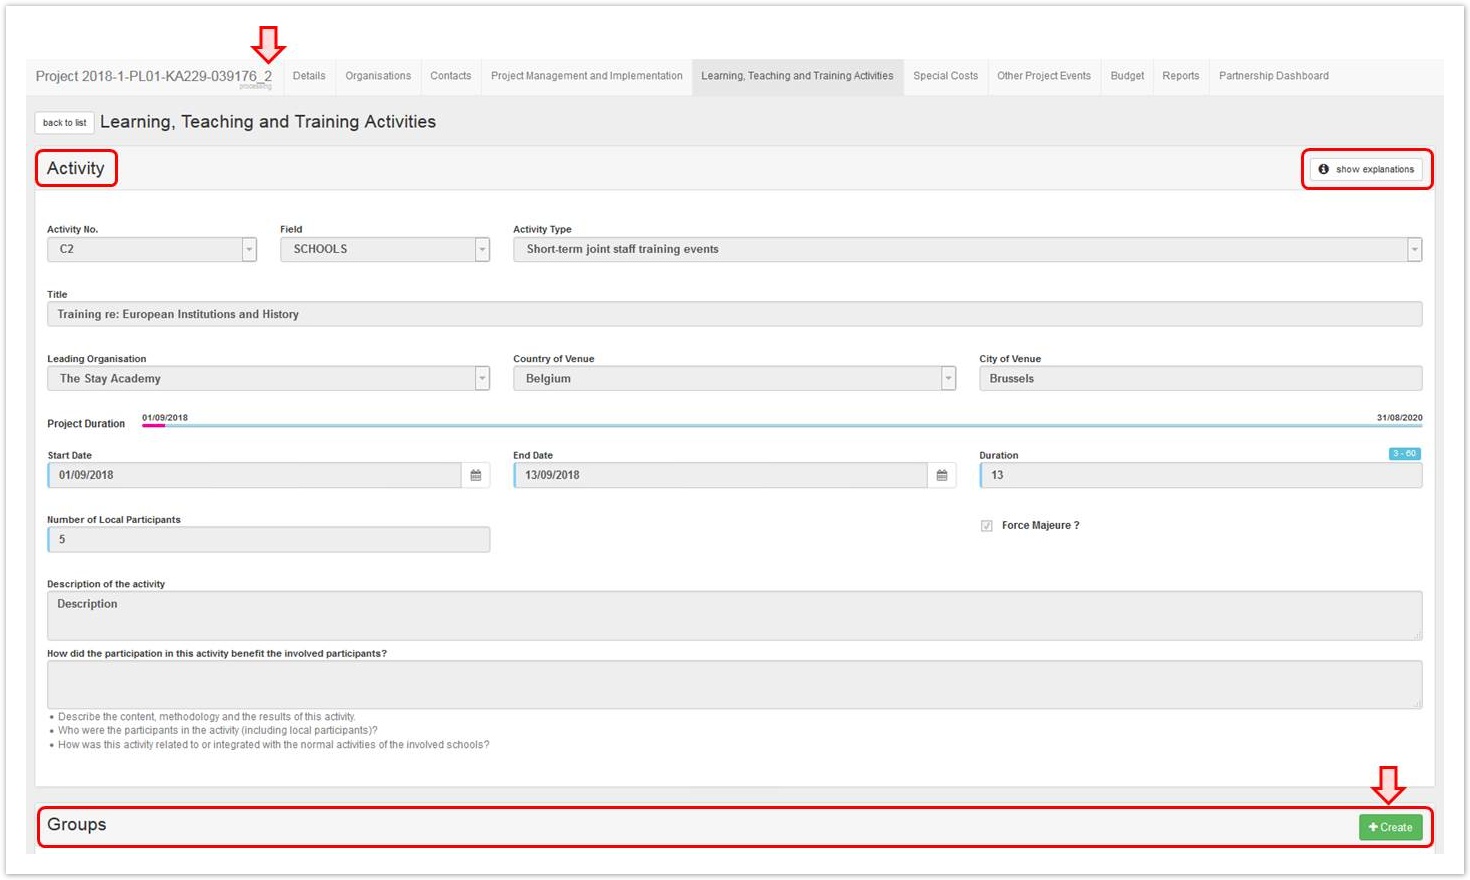 Image Removed
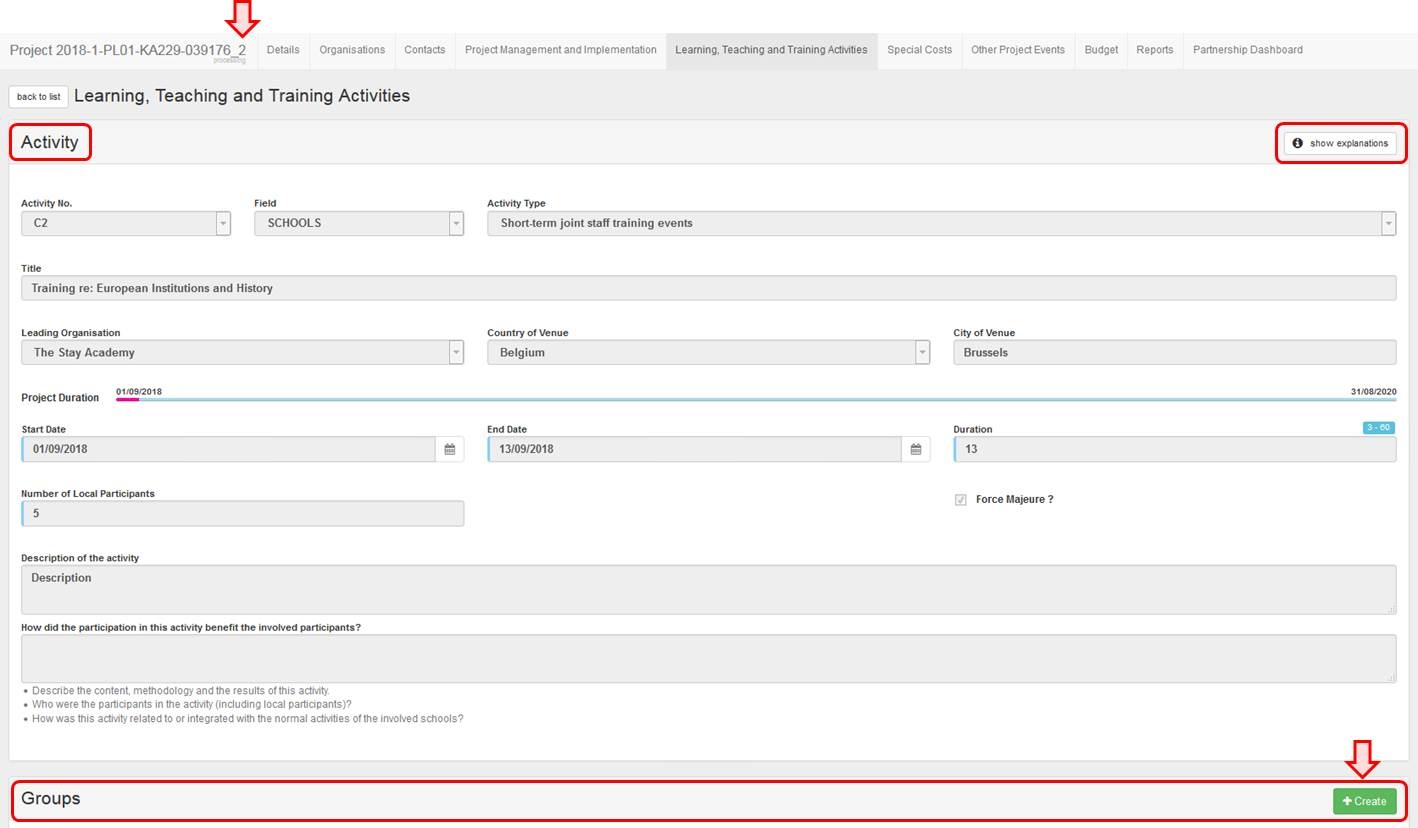 Image Added
| HTML |
|---|
<div class="page-break-simple"></div> |
Fill in the details
Note that the activity details as provided by the coordinator are displayed at the top of the screen.
In the Group screen fill in the fields as appropriate. You can use the show explanations button to display or hide onscreen instructions. You may need to scroll down to complete all the fields.
The requested grants as well as other values are calculated automatically based on the details you provide.
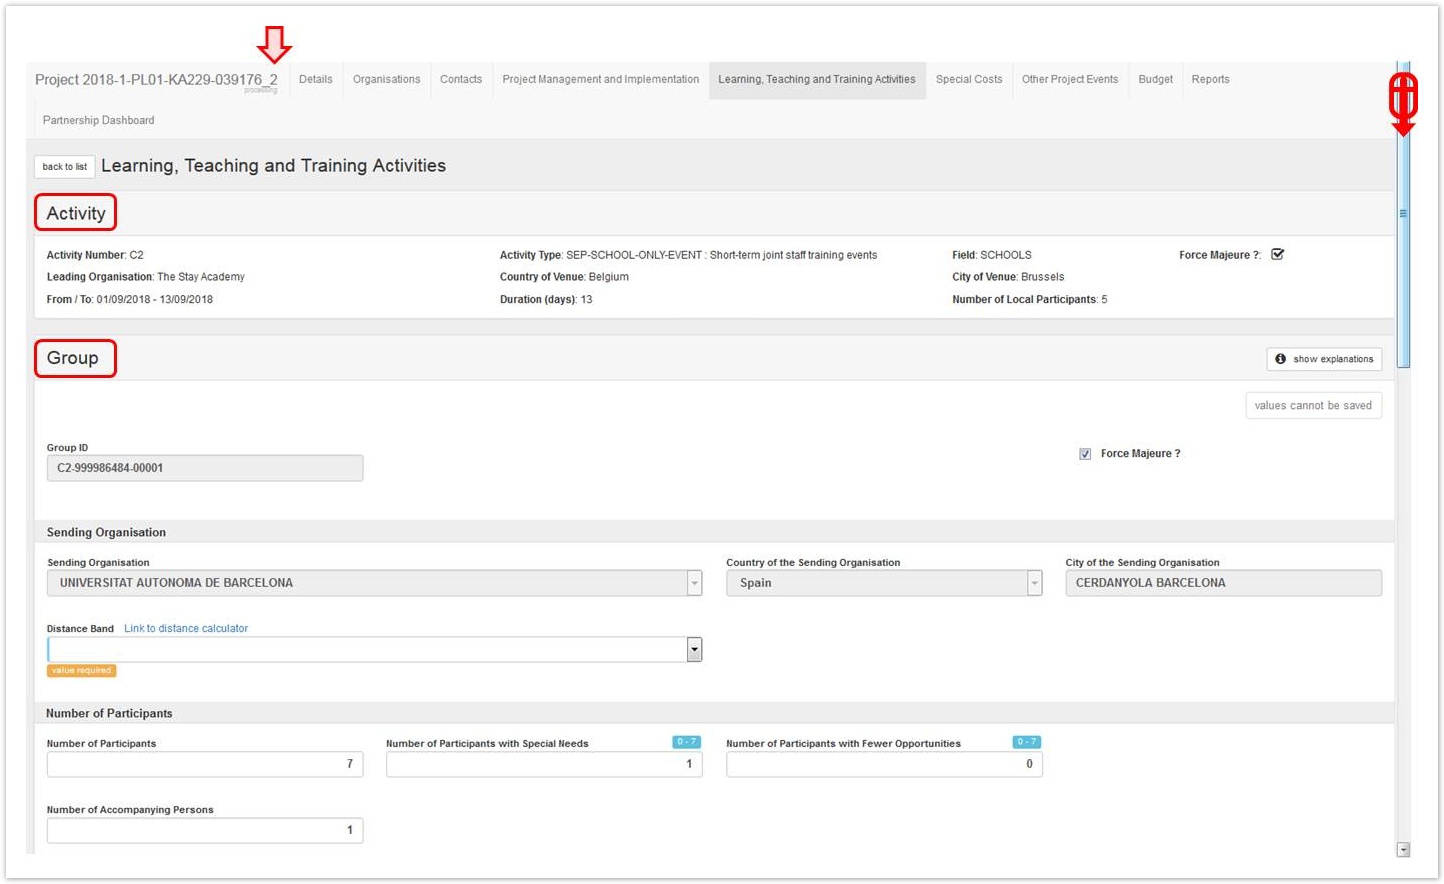 Image Removed
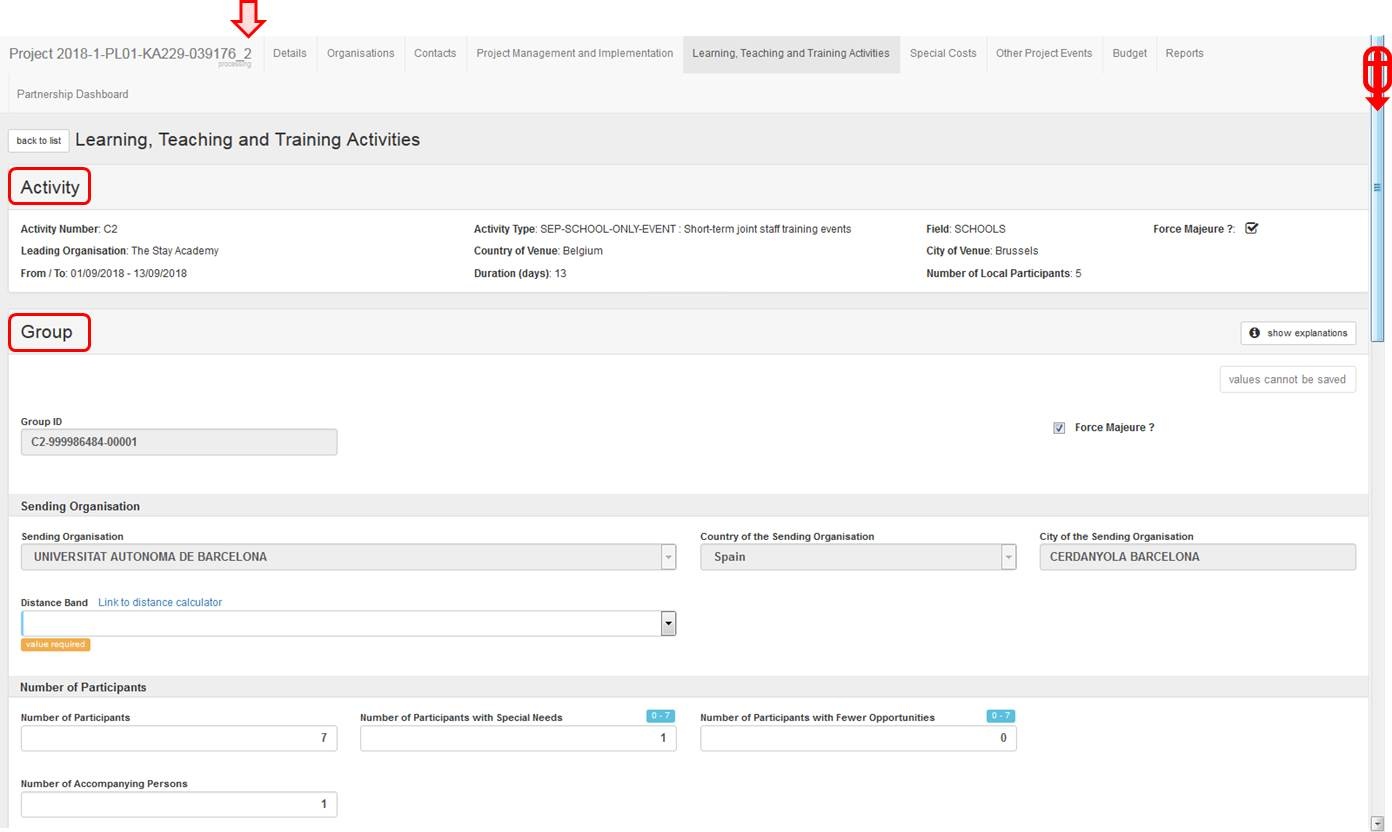 Image Added
| Info |
|---|
|
- Unlike activity numbers, the Group ID is assigned automatically.
- The organisation creating the group is implicitly selected as the Sending Organisation, and it cannot be changed regardless of the Leading Organisation.
- If Force Majeure was flagged at activity level, all new groups added to the activity will have the box ticked by default and additional Force Majeure Explanations are required. If this does not apply to your group, you can untick the box. See MT+ KA2 Force Majeure for further details about Force Majeure.
- An additional grant for Linguistic Support can be requested for long-term activities.
|
Click "Save"
Once all fields have been completed, click the Save button to save the details. The newly created group is displayed in the Groups list under the associated Activity.
 Image Removed
 Image Added
| HTML |
|---|
<div class="page-break-ruler"></div> |
Edit a group
Groups can be edited only by the partners that added them.
To start editing a group, click the Edit icon next to it in the Groups list. Make the desired changes in the Group screen, then click Save to save the new details.

| HTML |
|---|
<div class="page-break-ruler"></div> |
Delete a group
Groups can only be deleted by the partners that added them. To delete the group, click the bin icon next to it in the Groups list.
A pop-up dialog is displayed. Click Delete to remove the group.
 Image Removed
 Image Added