This page explains the common list functionalities available in Mobility Tool+, for example in the Organisations or Contacts tabs. Icons used to sort or export lists remain the same for each screen as well as the icons to edit, delete and view the various list items.
<div class="page-break-ruler"> </div> |
Search
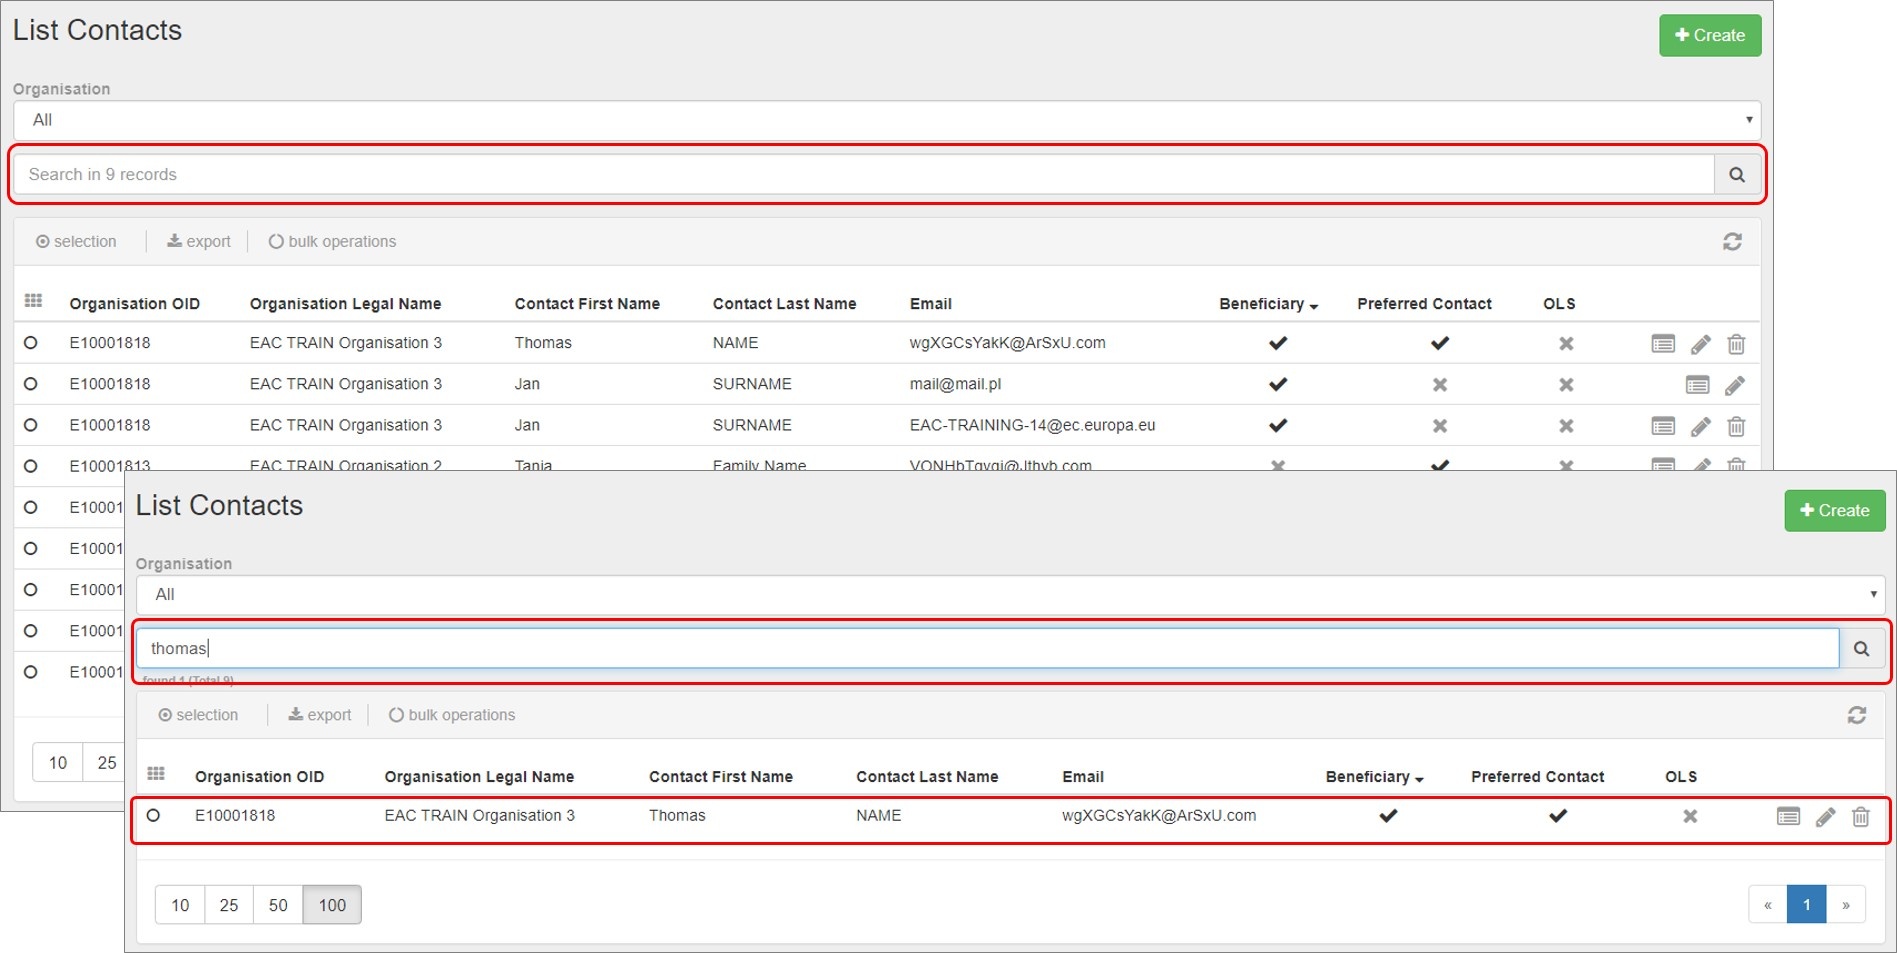
In order to find information quickly in the various project tabs, type, for example; the surname of a contact in the Search field under the contacts tab in Mobility Tool+ and click the magnifying glass. The result(s) will appear in the list.
<div class="page-break-ruler"> </div> |
Selection
The Selection option allows you to select or deselect all available items in a list view. By clicking on the radio button, you can select:
all in this page, all existing records, none or inverse.
In the example below the option All existing records is selected.

<div class="page-break-ruler"> </div> |
Export
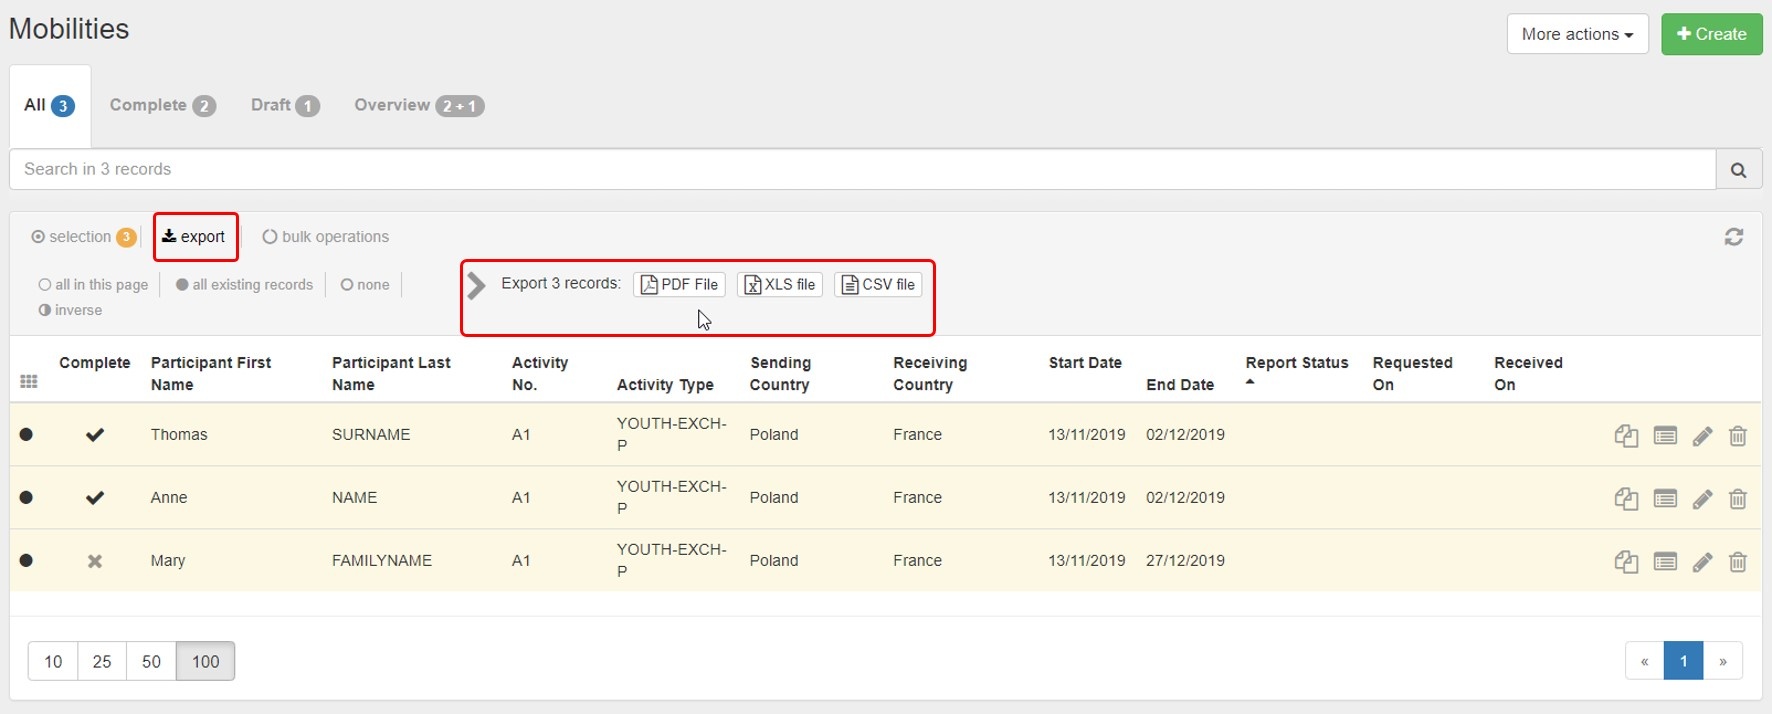
The Export button allows to export your selection as either a PDF File, XLS file or CSV file.
Once an export option has been selected, follow the on screen information to either save or open the file, depending on your settings and the browser used.
<div class="page-break-ruler"> </div> |
Bulk operations
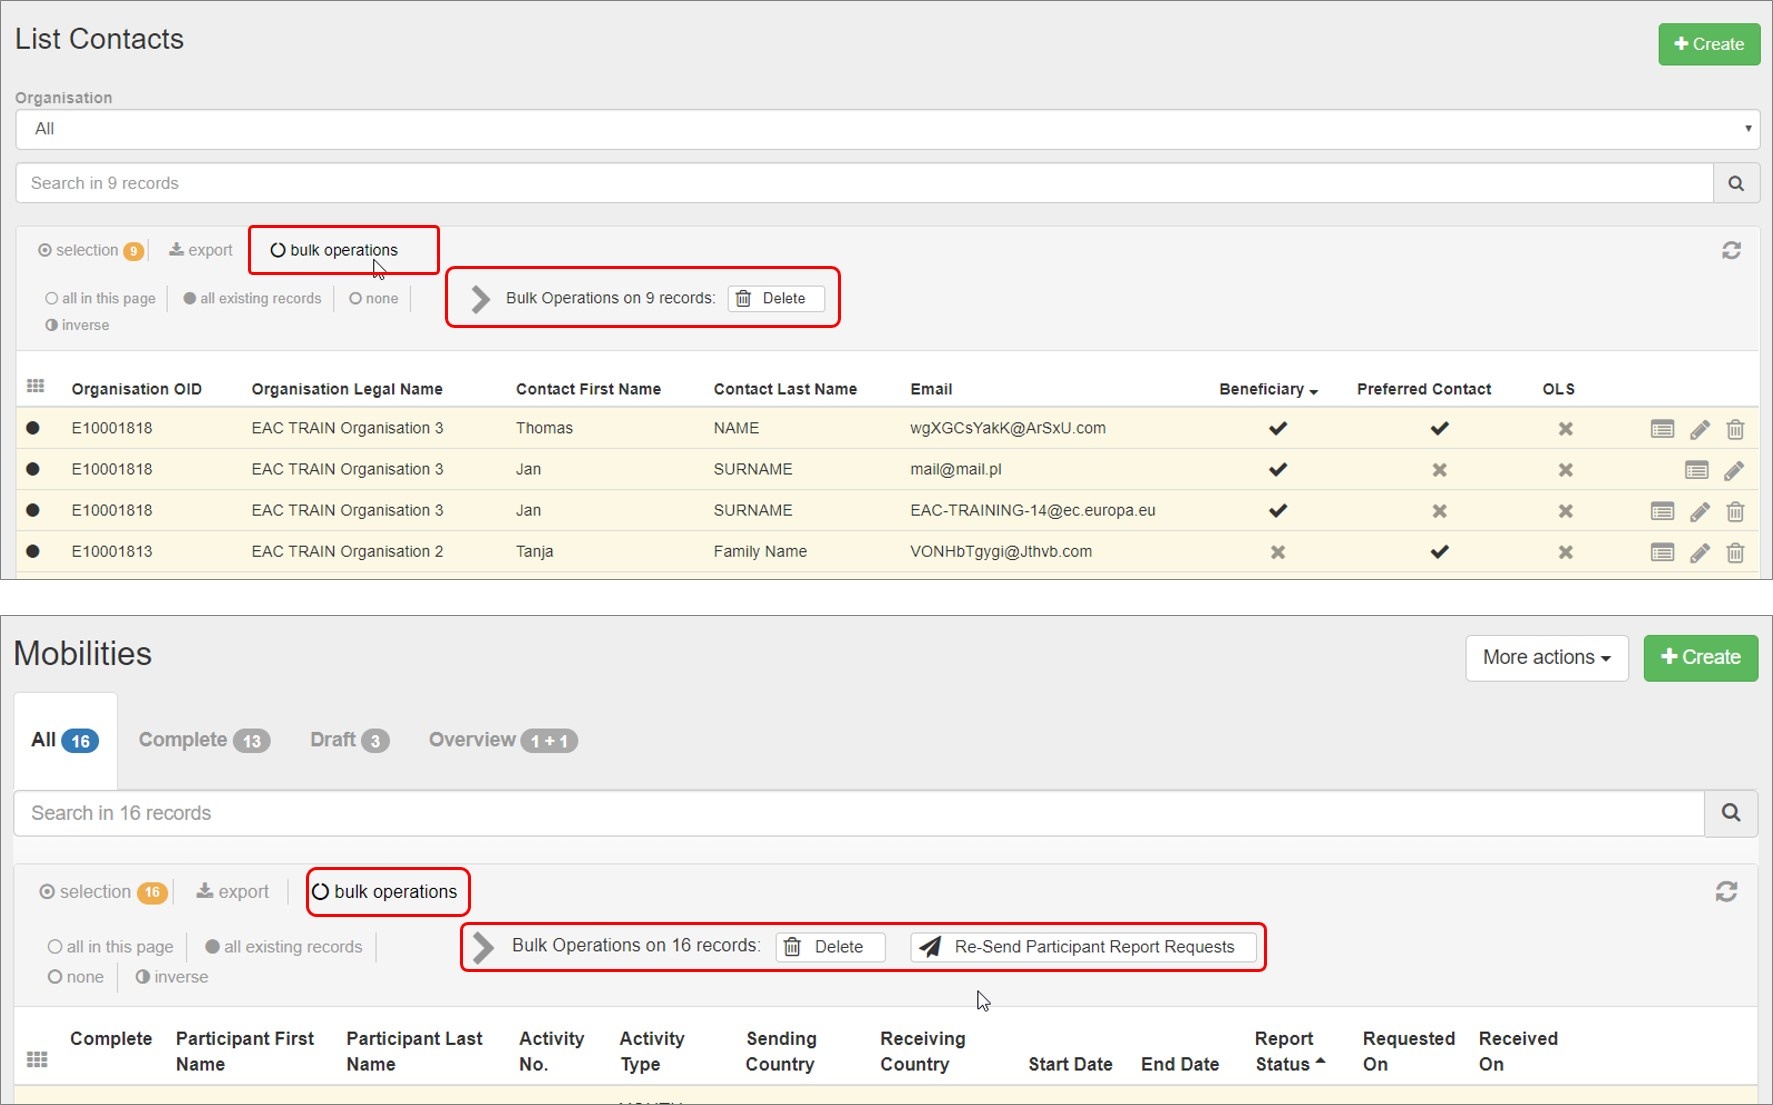
The bulk operations functionality allows to apply a specific operation to multiple list items at once. Depending on the project, the list and your user access, different bulk operations are possible.
Our example shows the possibility to Delete all selected items from the list.
<div class="page-break-ruler"> </div> |
View
To view the details of a specific list item, click the view icon. The item opens in read-only mode, all fields are greyed out.

<div class="page-break-ruler"> </div> |
Edit
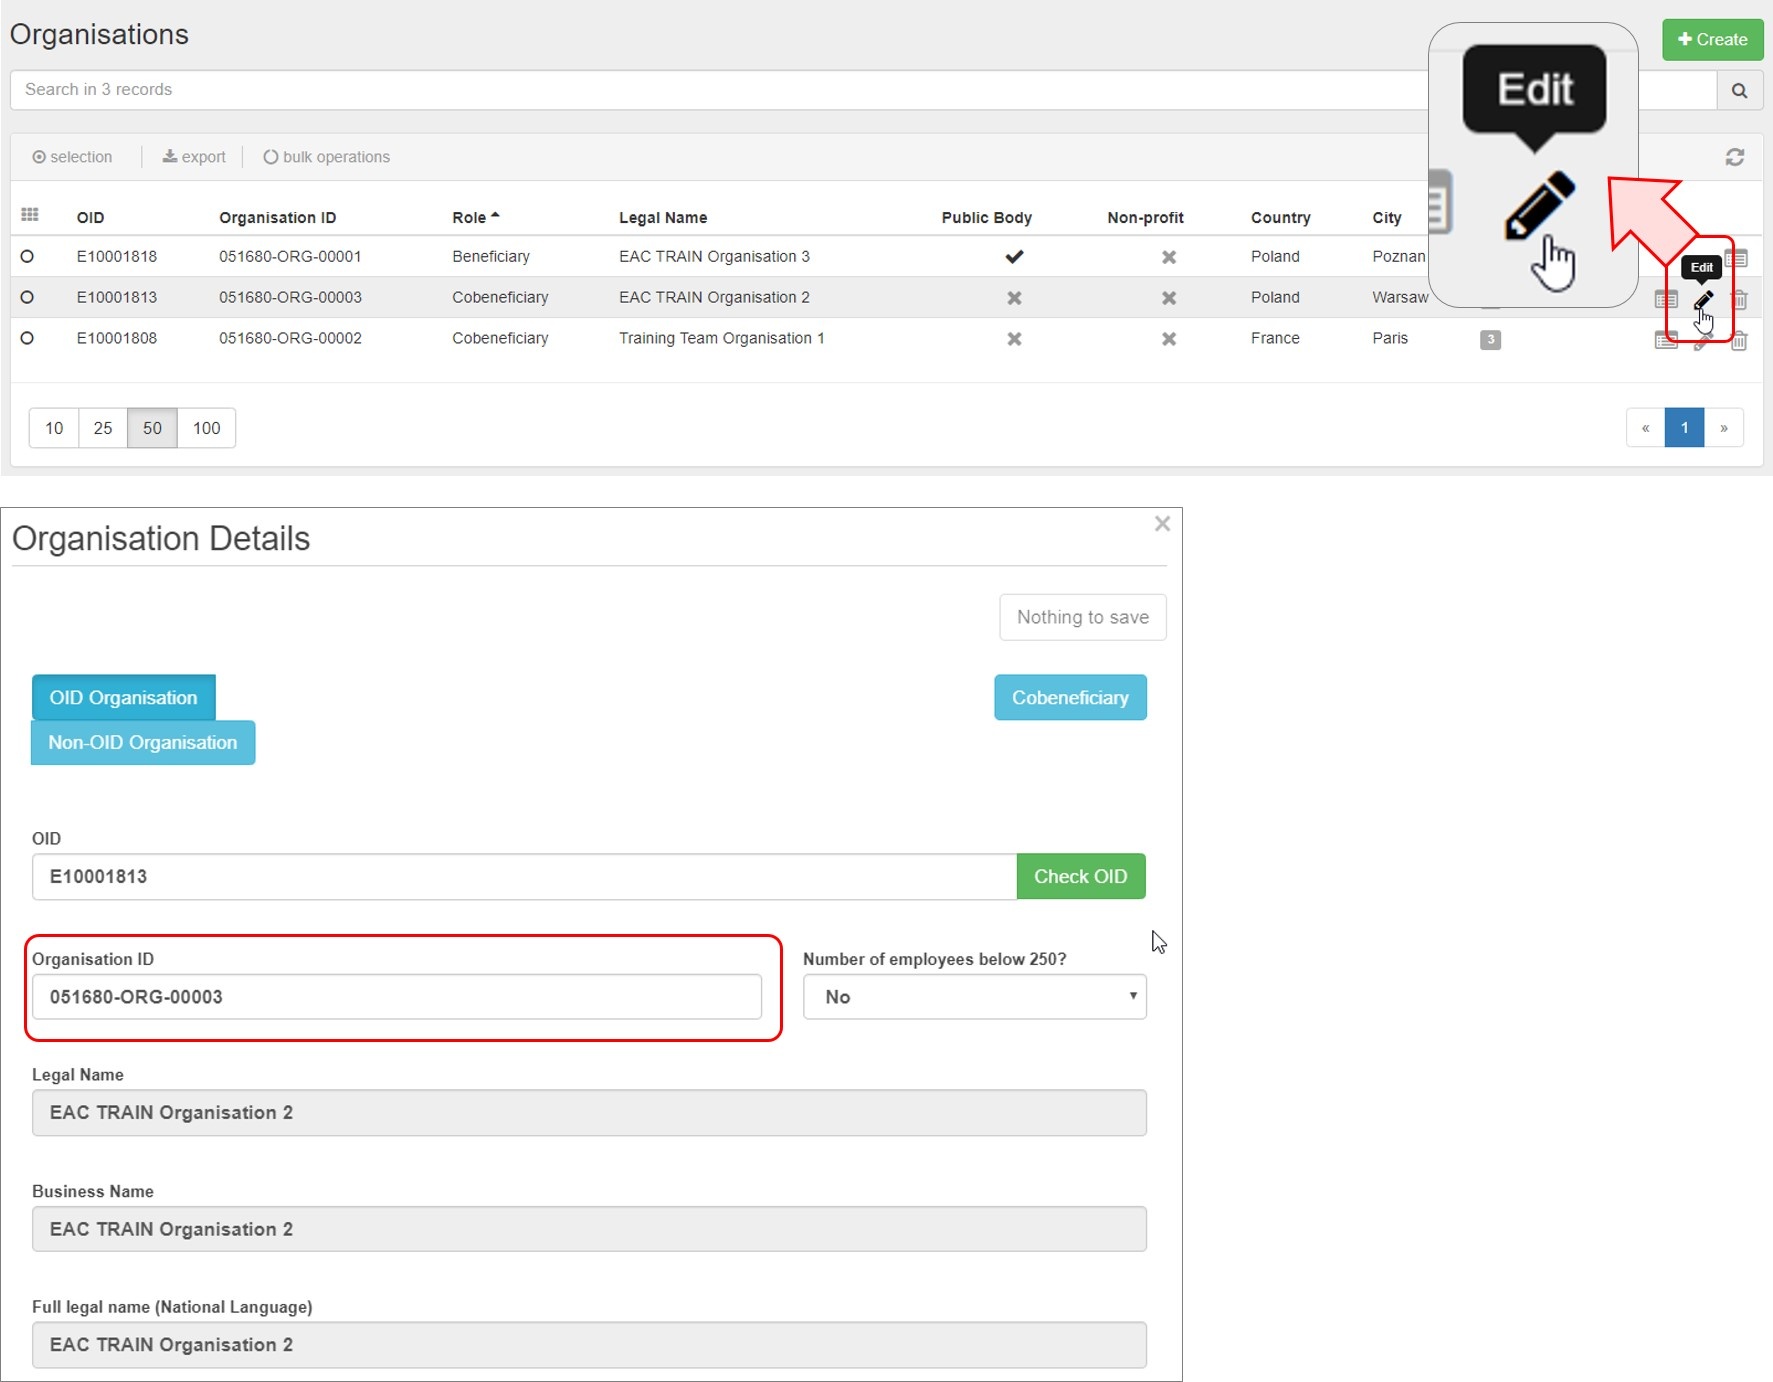
To edit the details of a specific list item, click the pencil icon. The item opens in edit mode and modifications can be made and saved.
<div class="page-break-ruler"> </div> |
Delete
To delete a specific list item, click the delete / bin icon. Confirm the deletion in the pop-up.

<div class="page-break-ruler"> </div> |
Back to list
In order to get back to the list view, click the back to list button. You will be redirected to the list view of the specific item.

<div class="page-break-ruler"> </div> |
Add/Remove columns
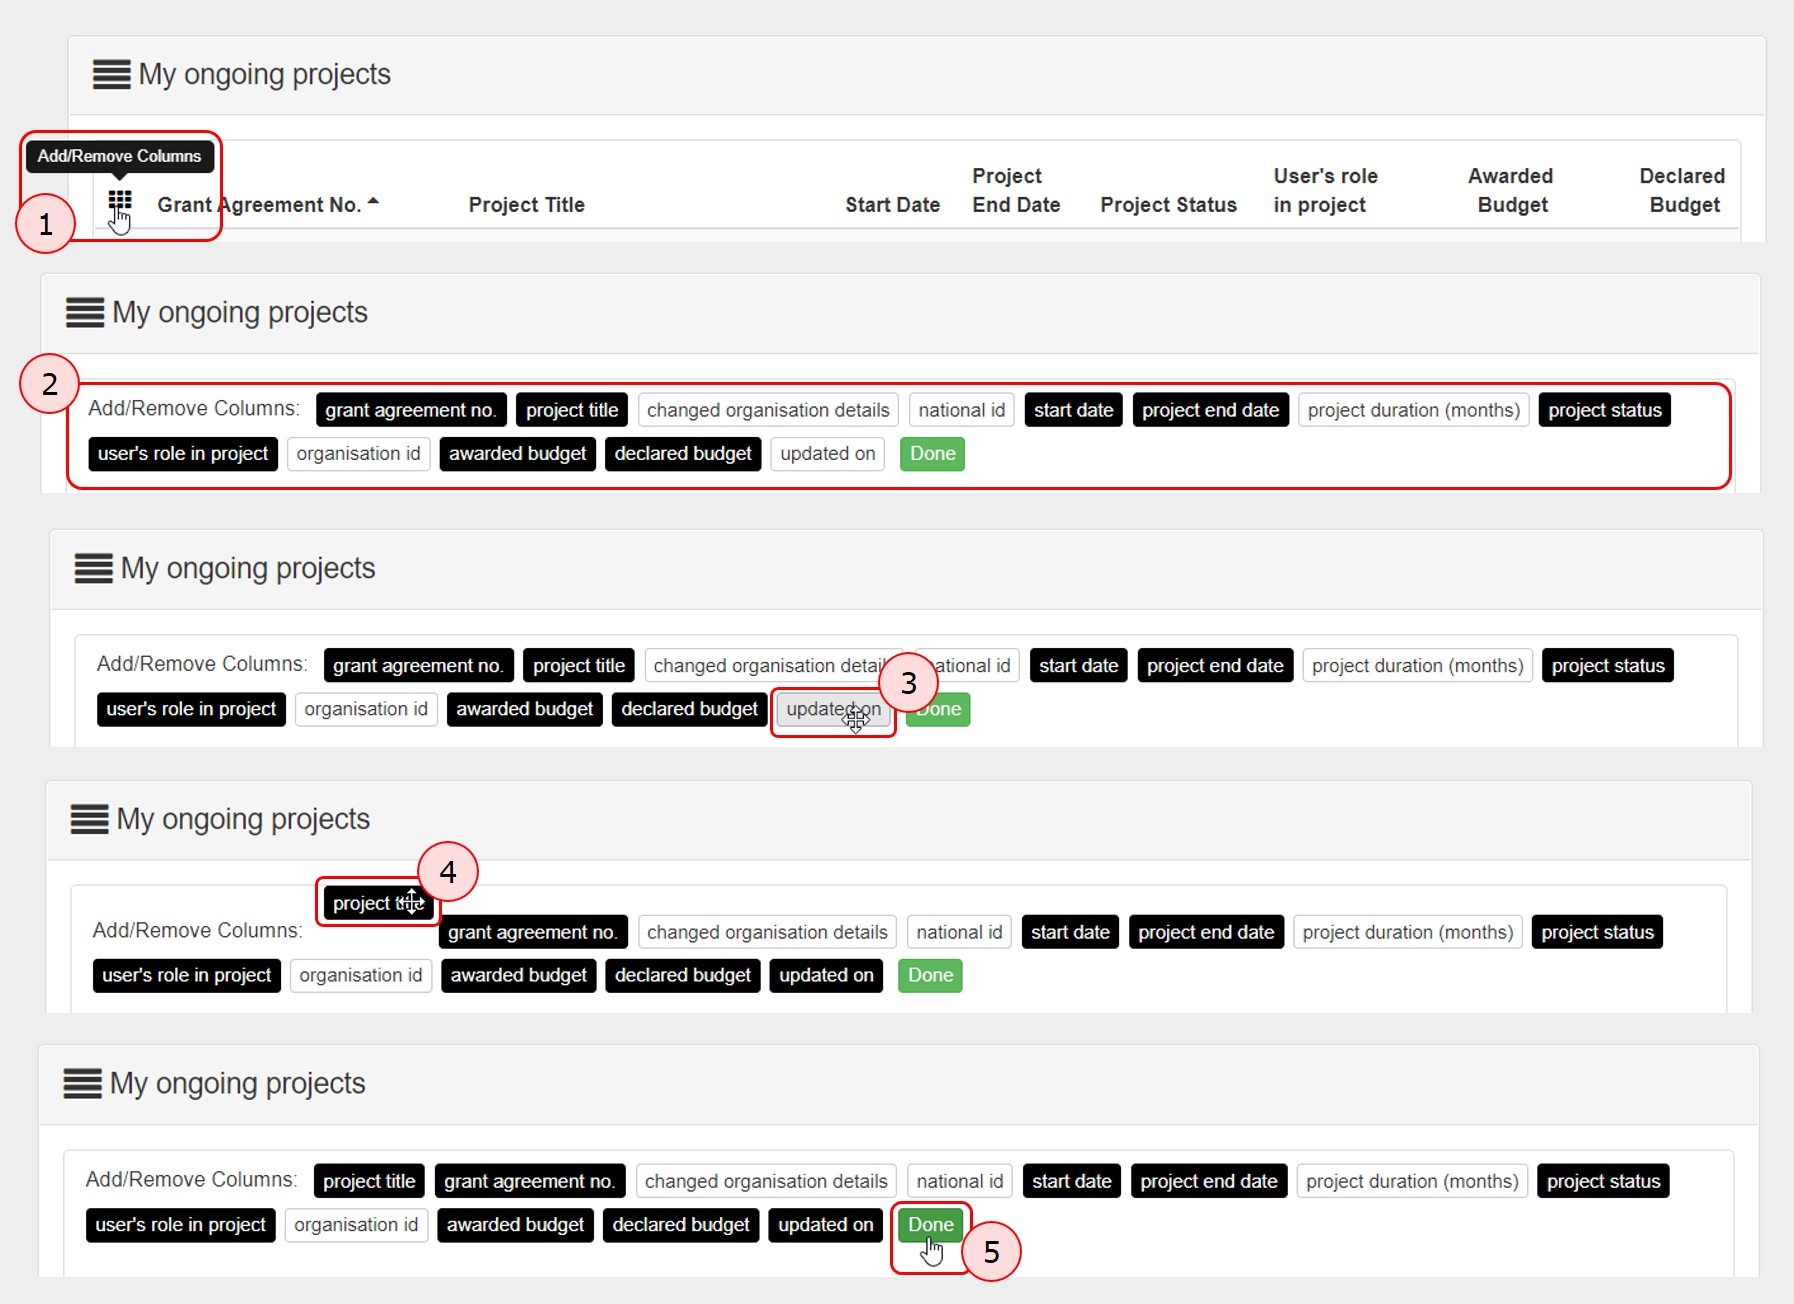
Most lists have the option to modify the view to your specific requirements. Specific columns which are available but not visible can be added. Columns visible that are not needed can be removed from display.
The Add/Remove Columns option allows you to select or to deselect columns as well as arrange the order of the columns in the list.
- Click the Add/Remove Columns option.
- The options appear at the top of the window. Black columns are already selected and displayed in the list view.
- Click on the black column to remove it from the list view and click the white column to add it tot the list view. Your changes are reflected immediately.
- You can also drag and release a column button to rearrange its position in the list.
- Click the green Done button to close the Add/Remove Columns option. The list columns are updated accordingly.
<div class="page-break-ruler"> </div> |